> ## Documentation Index
> Fetch the complete documentation index at: https://docs.witting.ai/llms.txt
> Use this file to discover all available pages before exploring further.
# Create Your First AI Actor
> Step-by-step guide to creating your first AI Actor in Vocalis. Configure voice, write a Purpose, define insights, and set up reports — no code required.
An AI Actor is your AI-powered interviewer. This guide walks you through setting one up.
1. Log in to [vocalis.witting.ai](https://vocalis.witting.ai).
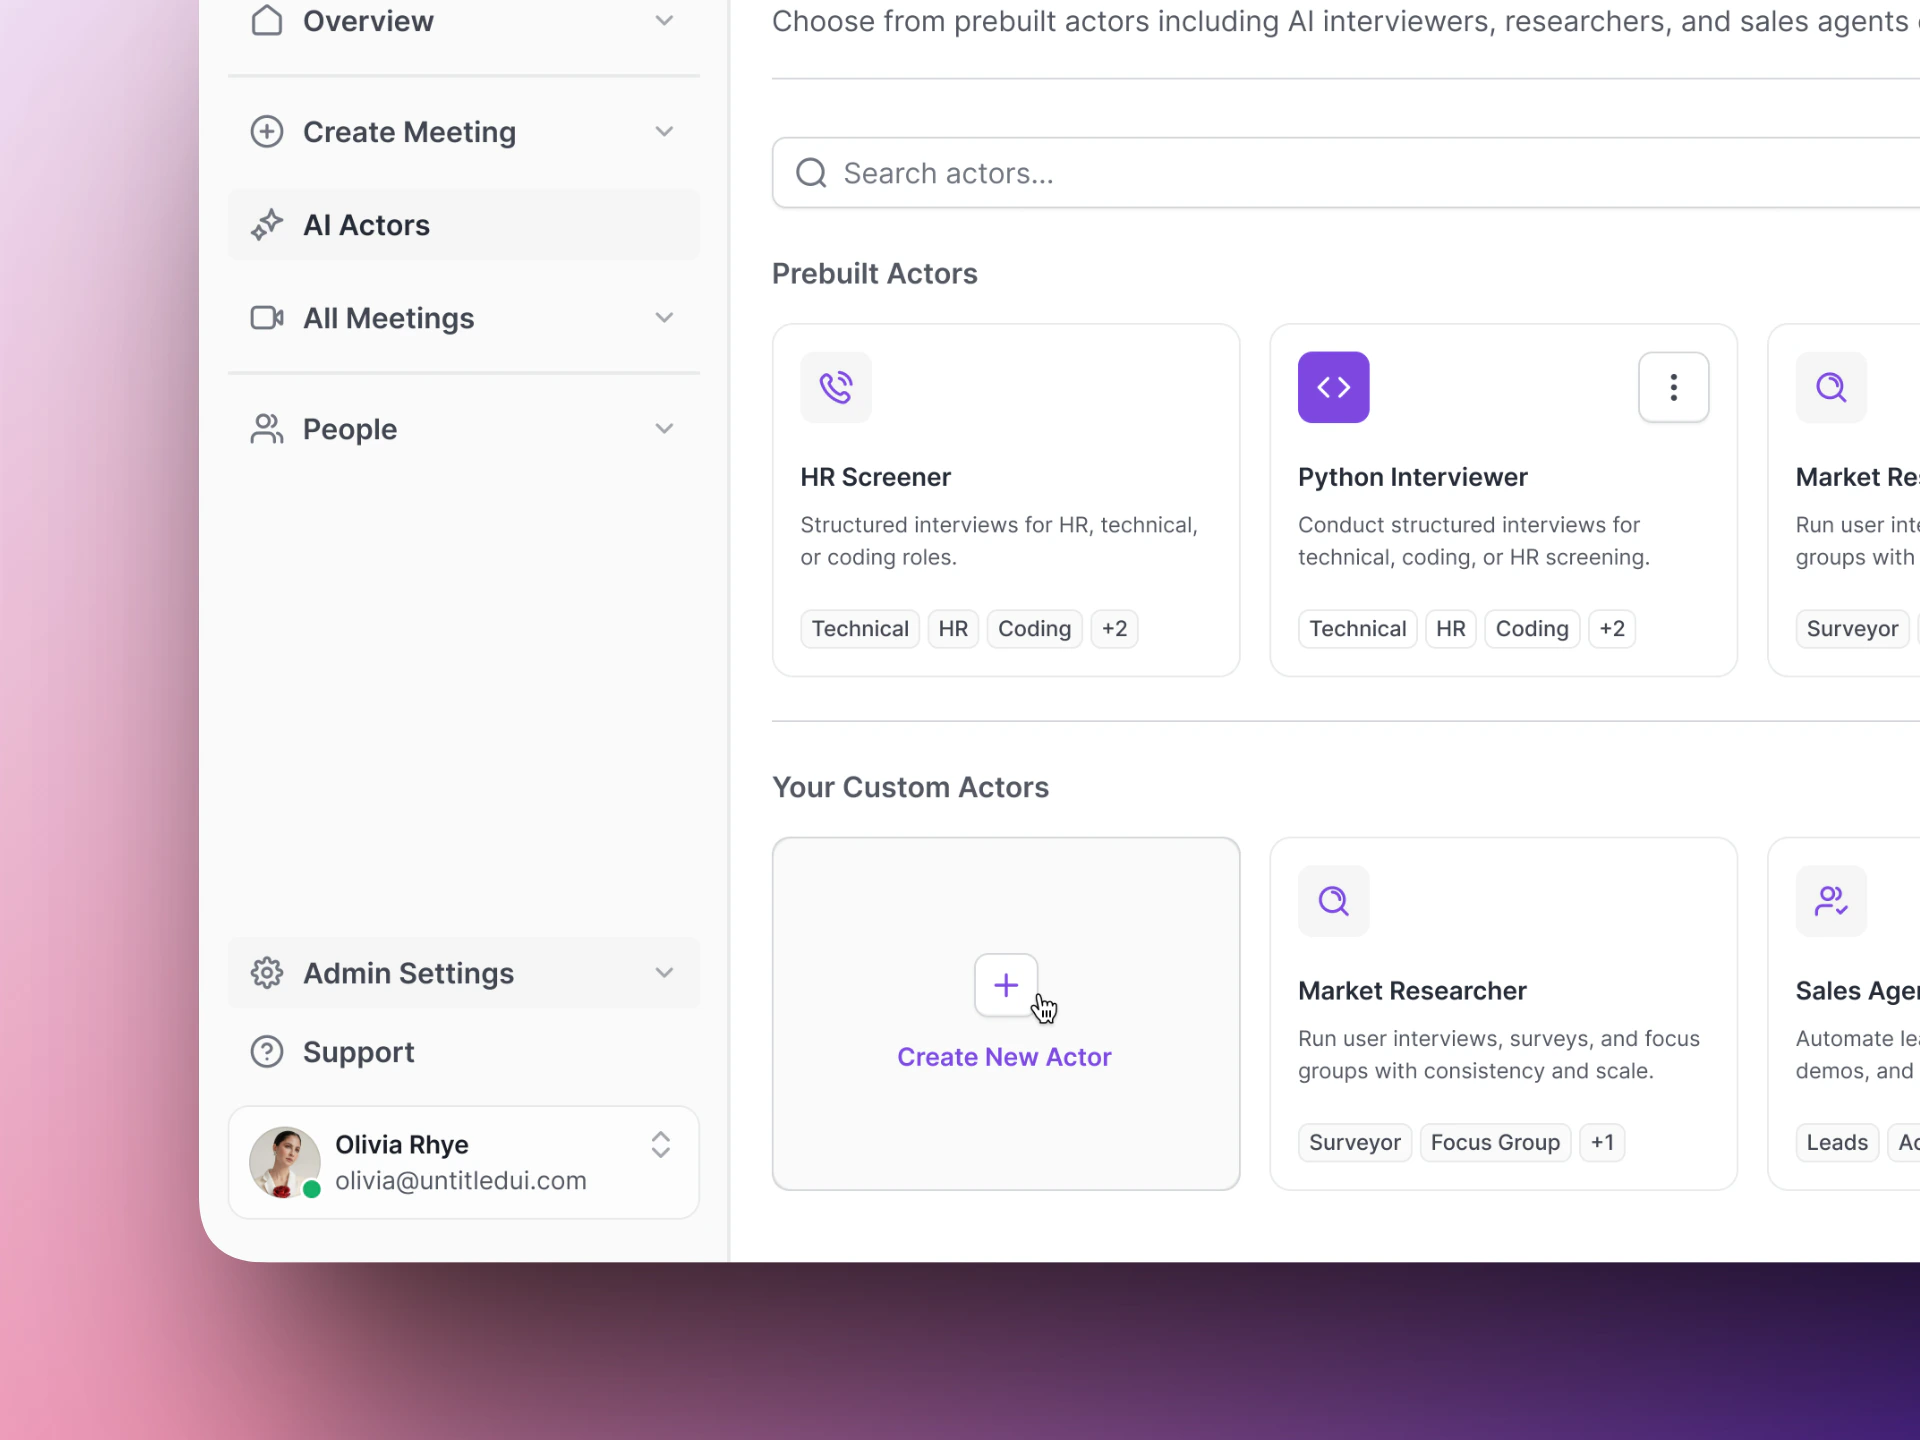
2. Click **AI Actors** in the left sidebar.
3. Click **Create Actor**.
 The setup wizard has four steps:
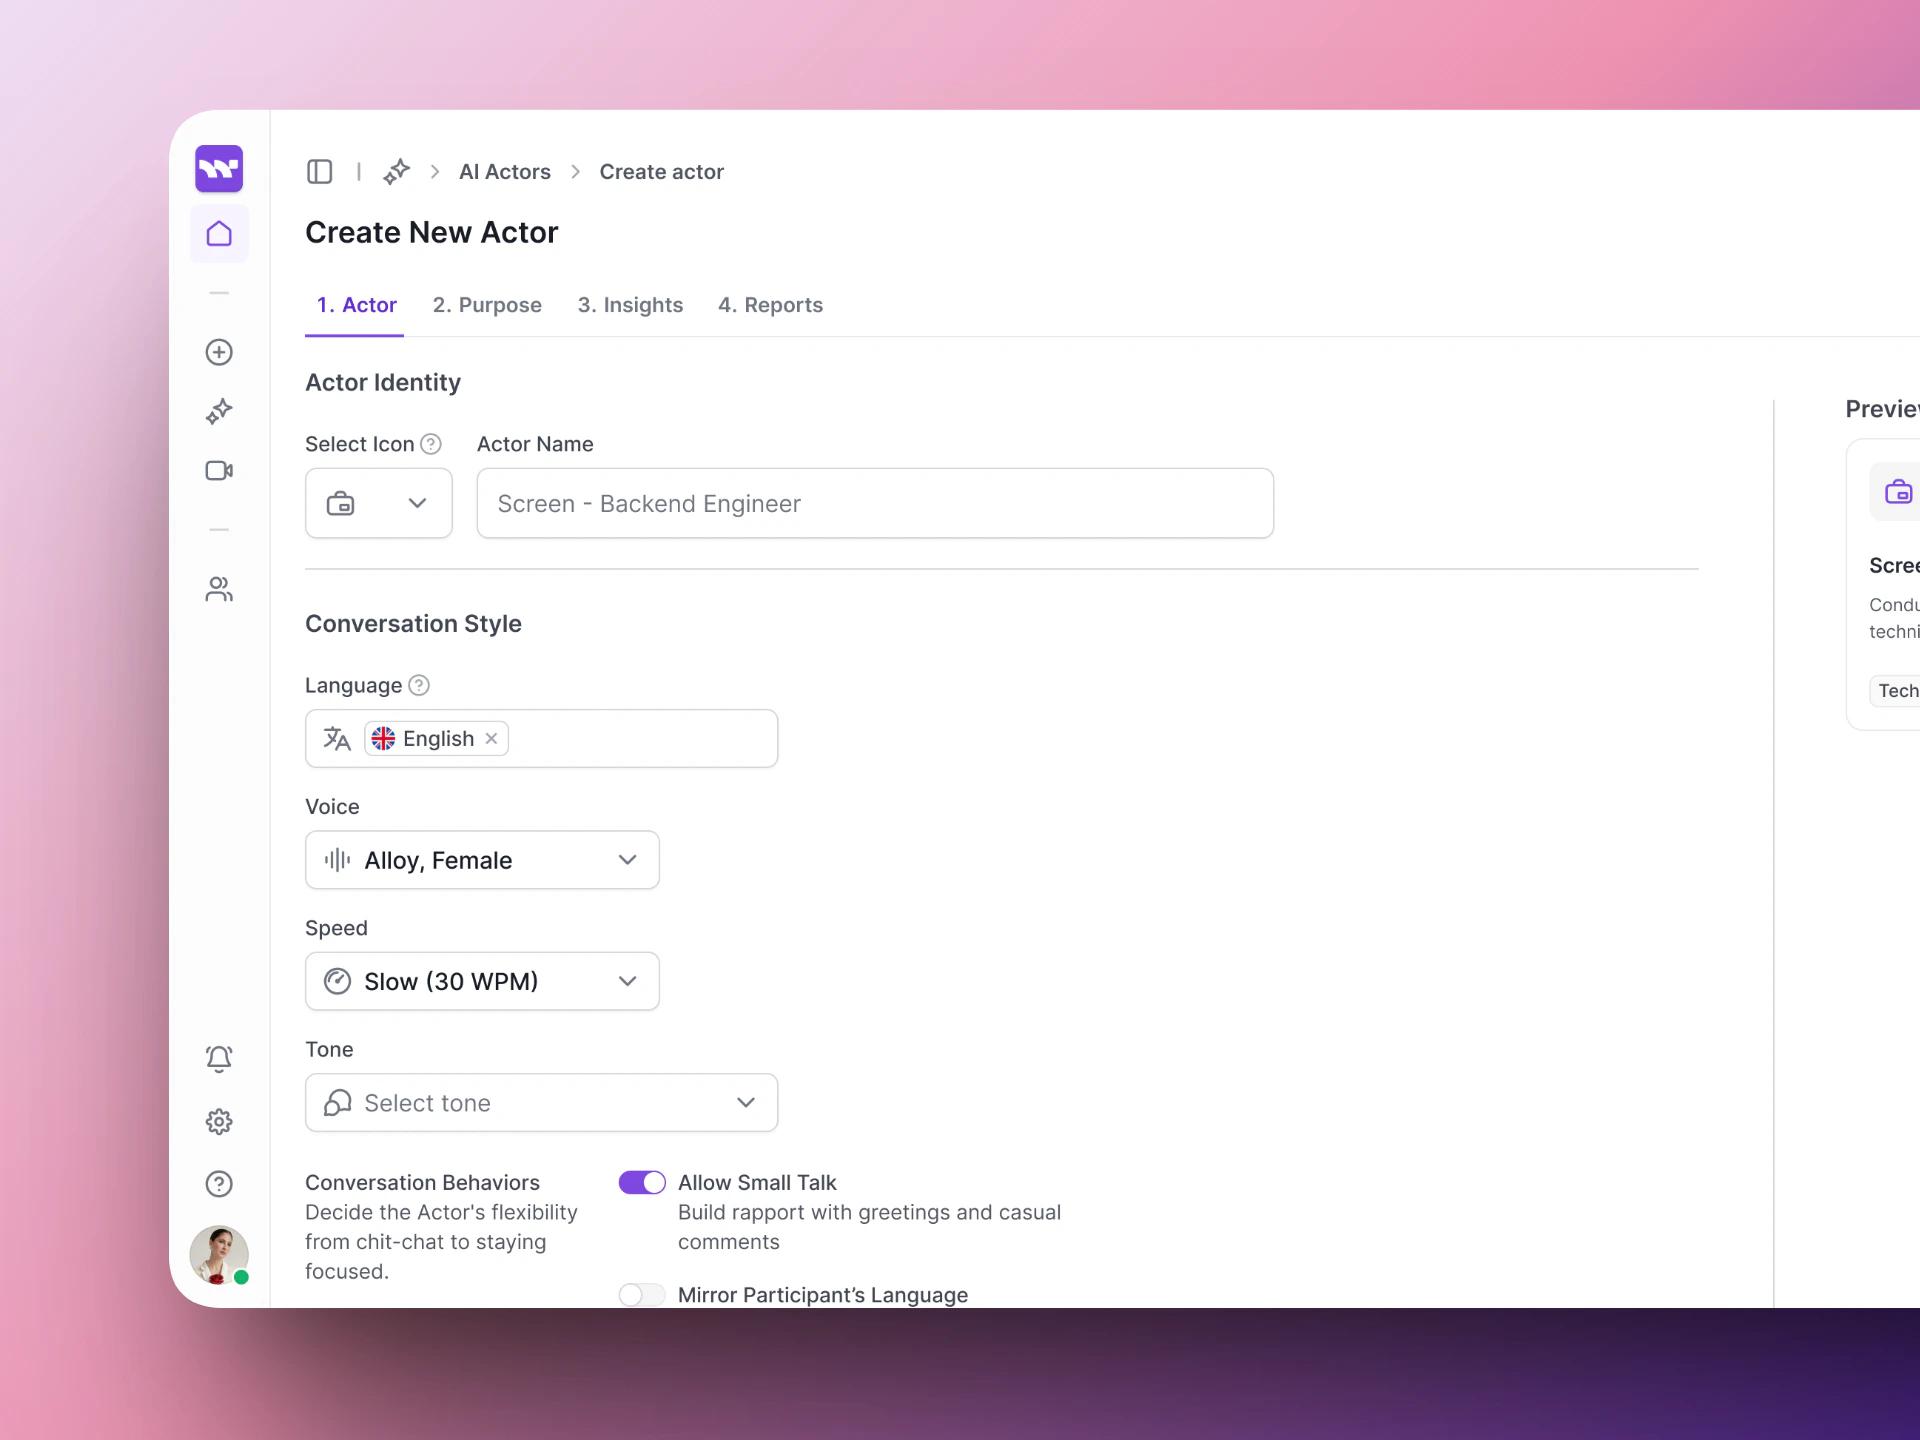
Give your AI Actor a name and choose how it sounds.
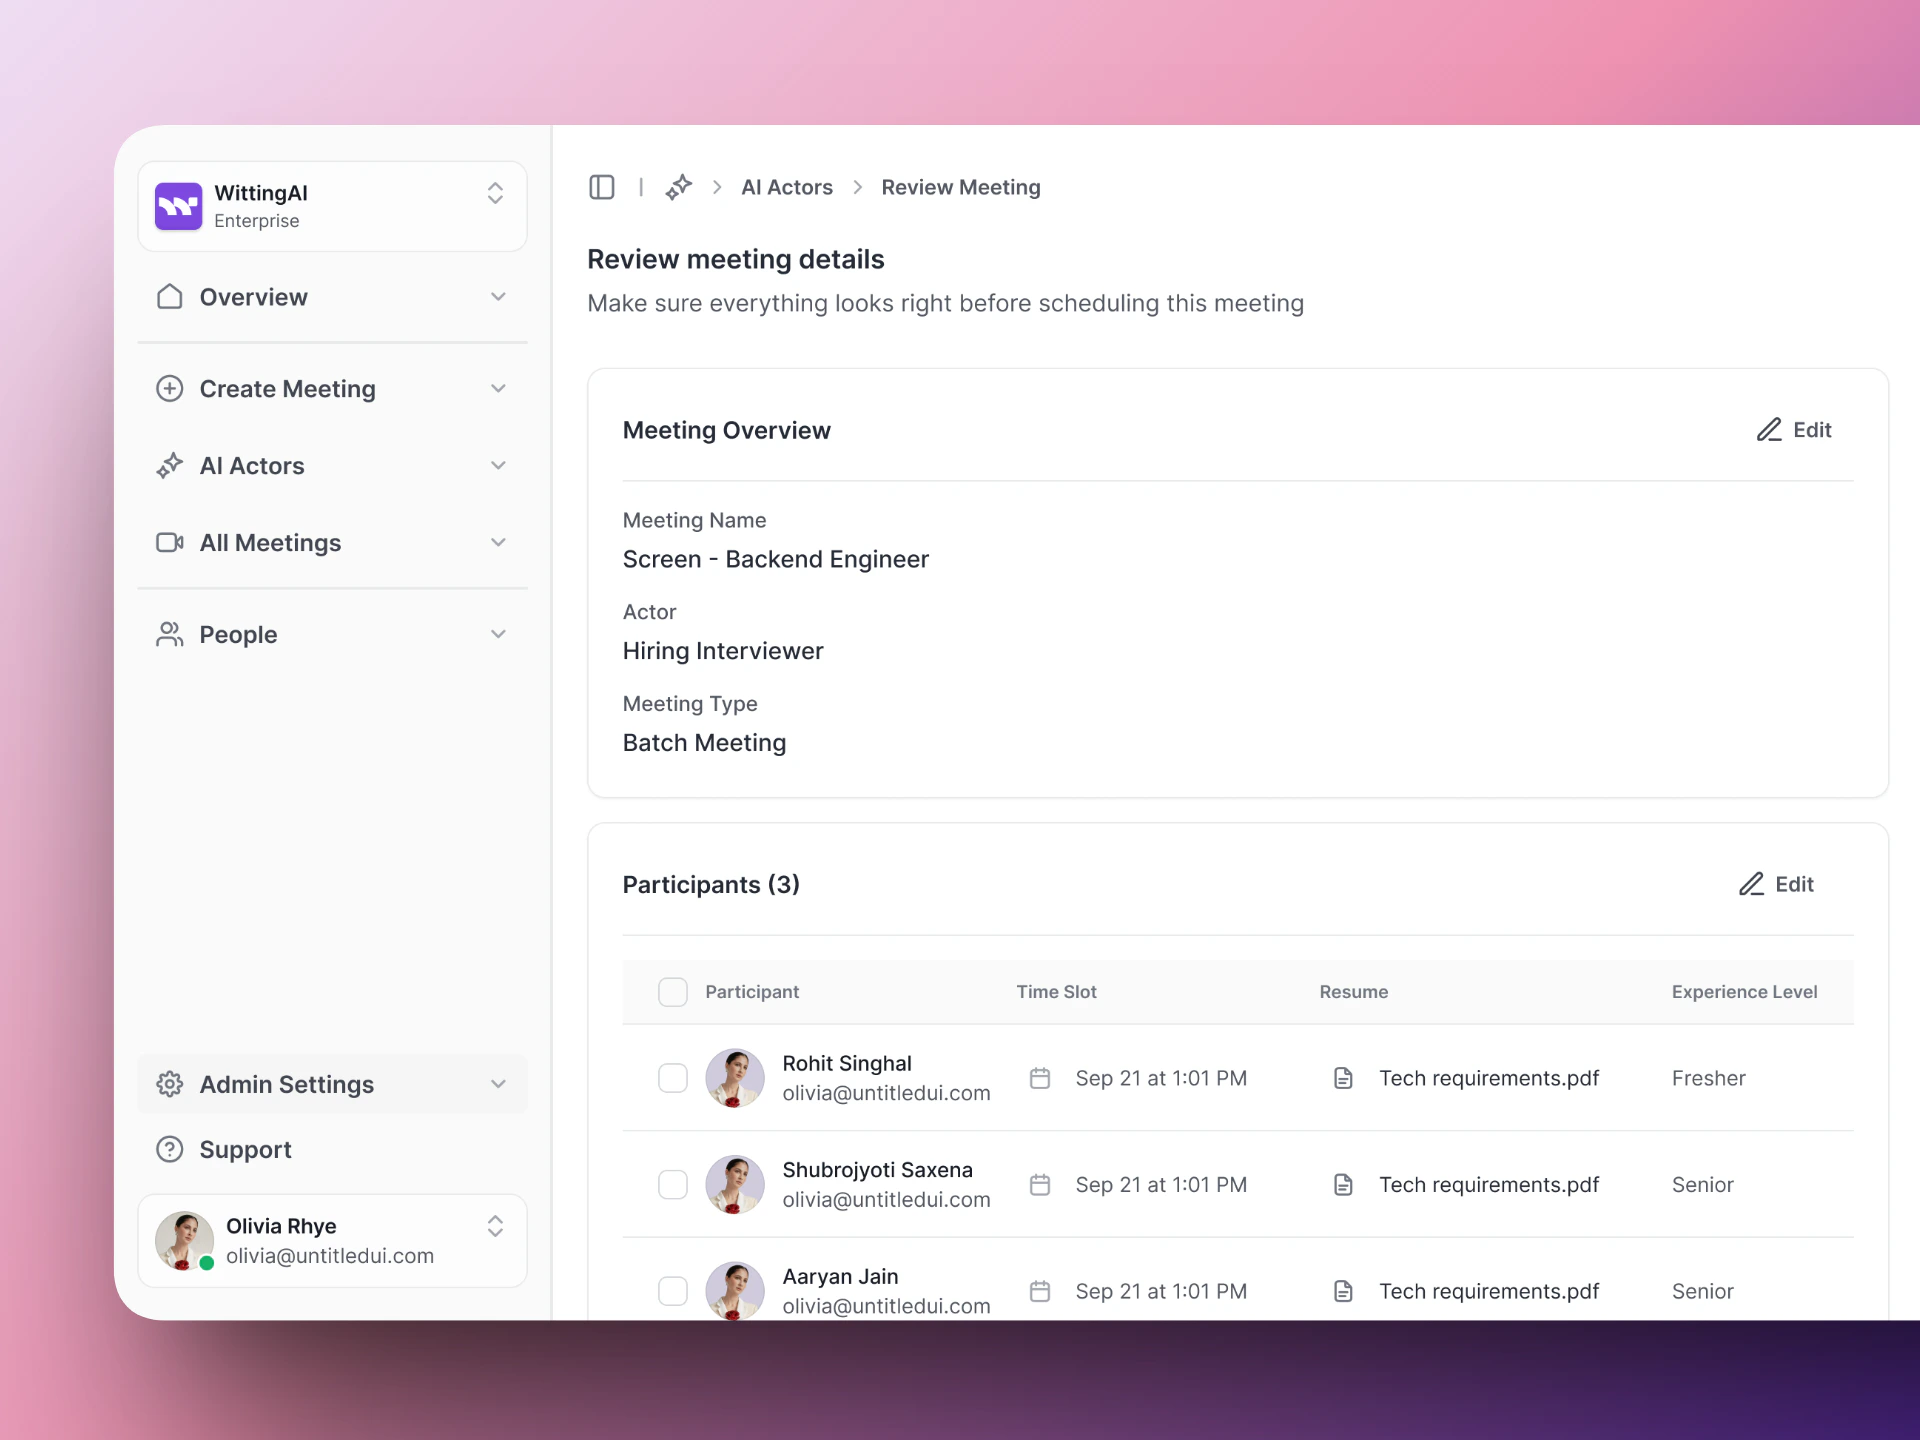
* **Name** — A display name for your team (e.g., "Screen - Backend Engineer"). Candidates do not see this.
* **Voice** — Pick a voice model. Each has a different tone and feel.
* **Language, tone, and speed** — Set the conversational style.
The setup wizard has four steps:
Give your AI Actor a name and choose how it sounds.
* **Name** — A display name for your team (e.g., "Screen - Backend Engineer"). Candidates do not see this.
* **Voice** — Pick a voice model. Each has a different tone and feel.
* **Language, tone, and speed** — Set the conversational style.
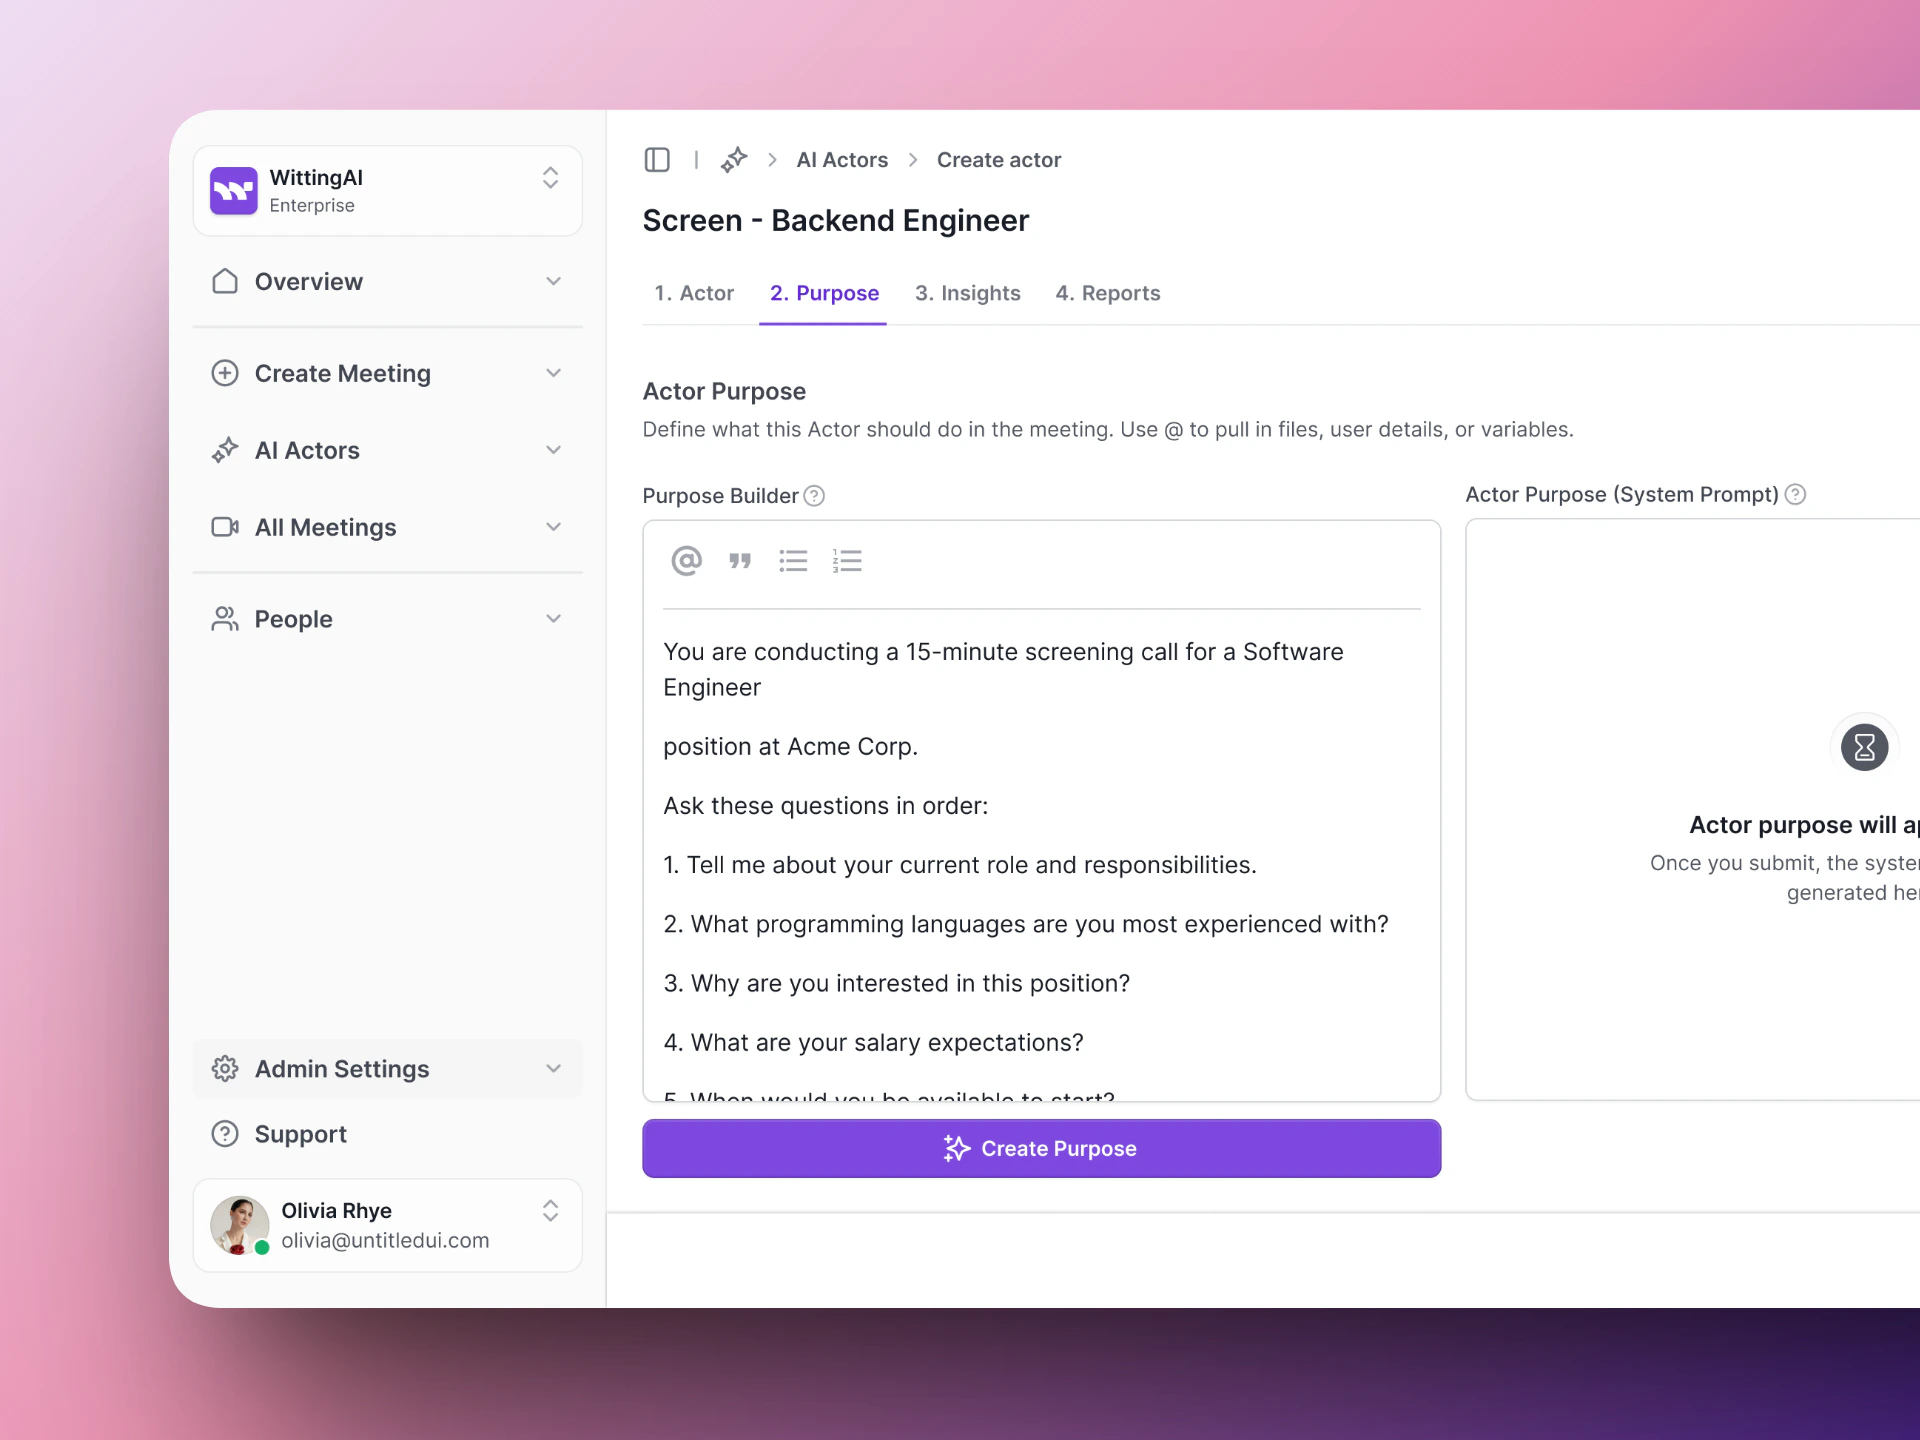
 Write the instructions that tell the AI what to do during the interview. A good Purpose includes the context, the questions to ask, behavior guidelines, and evaluation criteria.
Here is a simple starting point:
```
You are conducting a 15-minute screening call for a Software Engineer
position at Acme Corp.
Ask these questions in order:
1. Tell me about your current role and responsibilities.
2. What programming languages are you most experienced with?
3. Why are you interested in this position?
4. What are your salary expectations?
5. When would you be available to start?
Be friendly and conversational. If the candidate gives a short answer,
ask a brief follow-up to get more detail.
```
See [Actor Purpose](/vocalis/how-to/actor-purpose) for tips on writing better instructions.
Write the instructions that tell the AI what to do during the interview. A good Purpose includes the context, the questions to ask, behavior guidelines, and evaluation criteria.
Here is a simple starting point:
```
You are conducting a 15-minute screening call for a Software Engineer
position at Acme Corp.
Ask these questions in order:
1. Tell me about your current role and responsibilities.
2. What programming languages are you most experienced with?
3. Why are you interested in this position?
4. What are your salary expectations?
5. When would you be available to start?
Be friendly and conversational. If the candidate gives a short answer,
ask a brief follow-up to get more detail.
```
See [Actor Purpose](/vocalis/how-to/actor-purpose) for tips on writing better instructions.
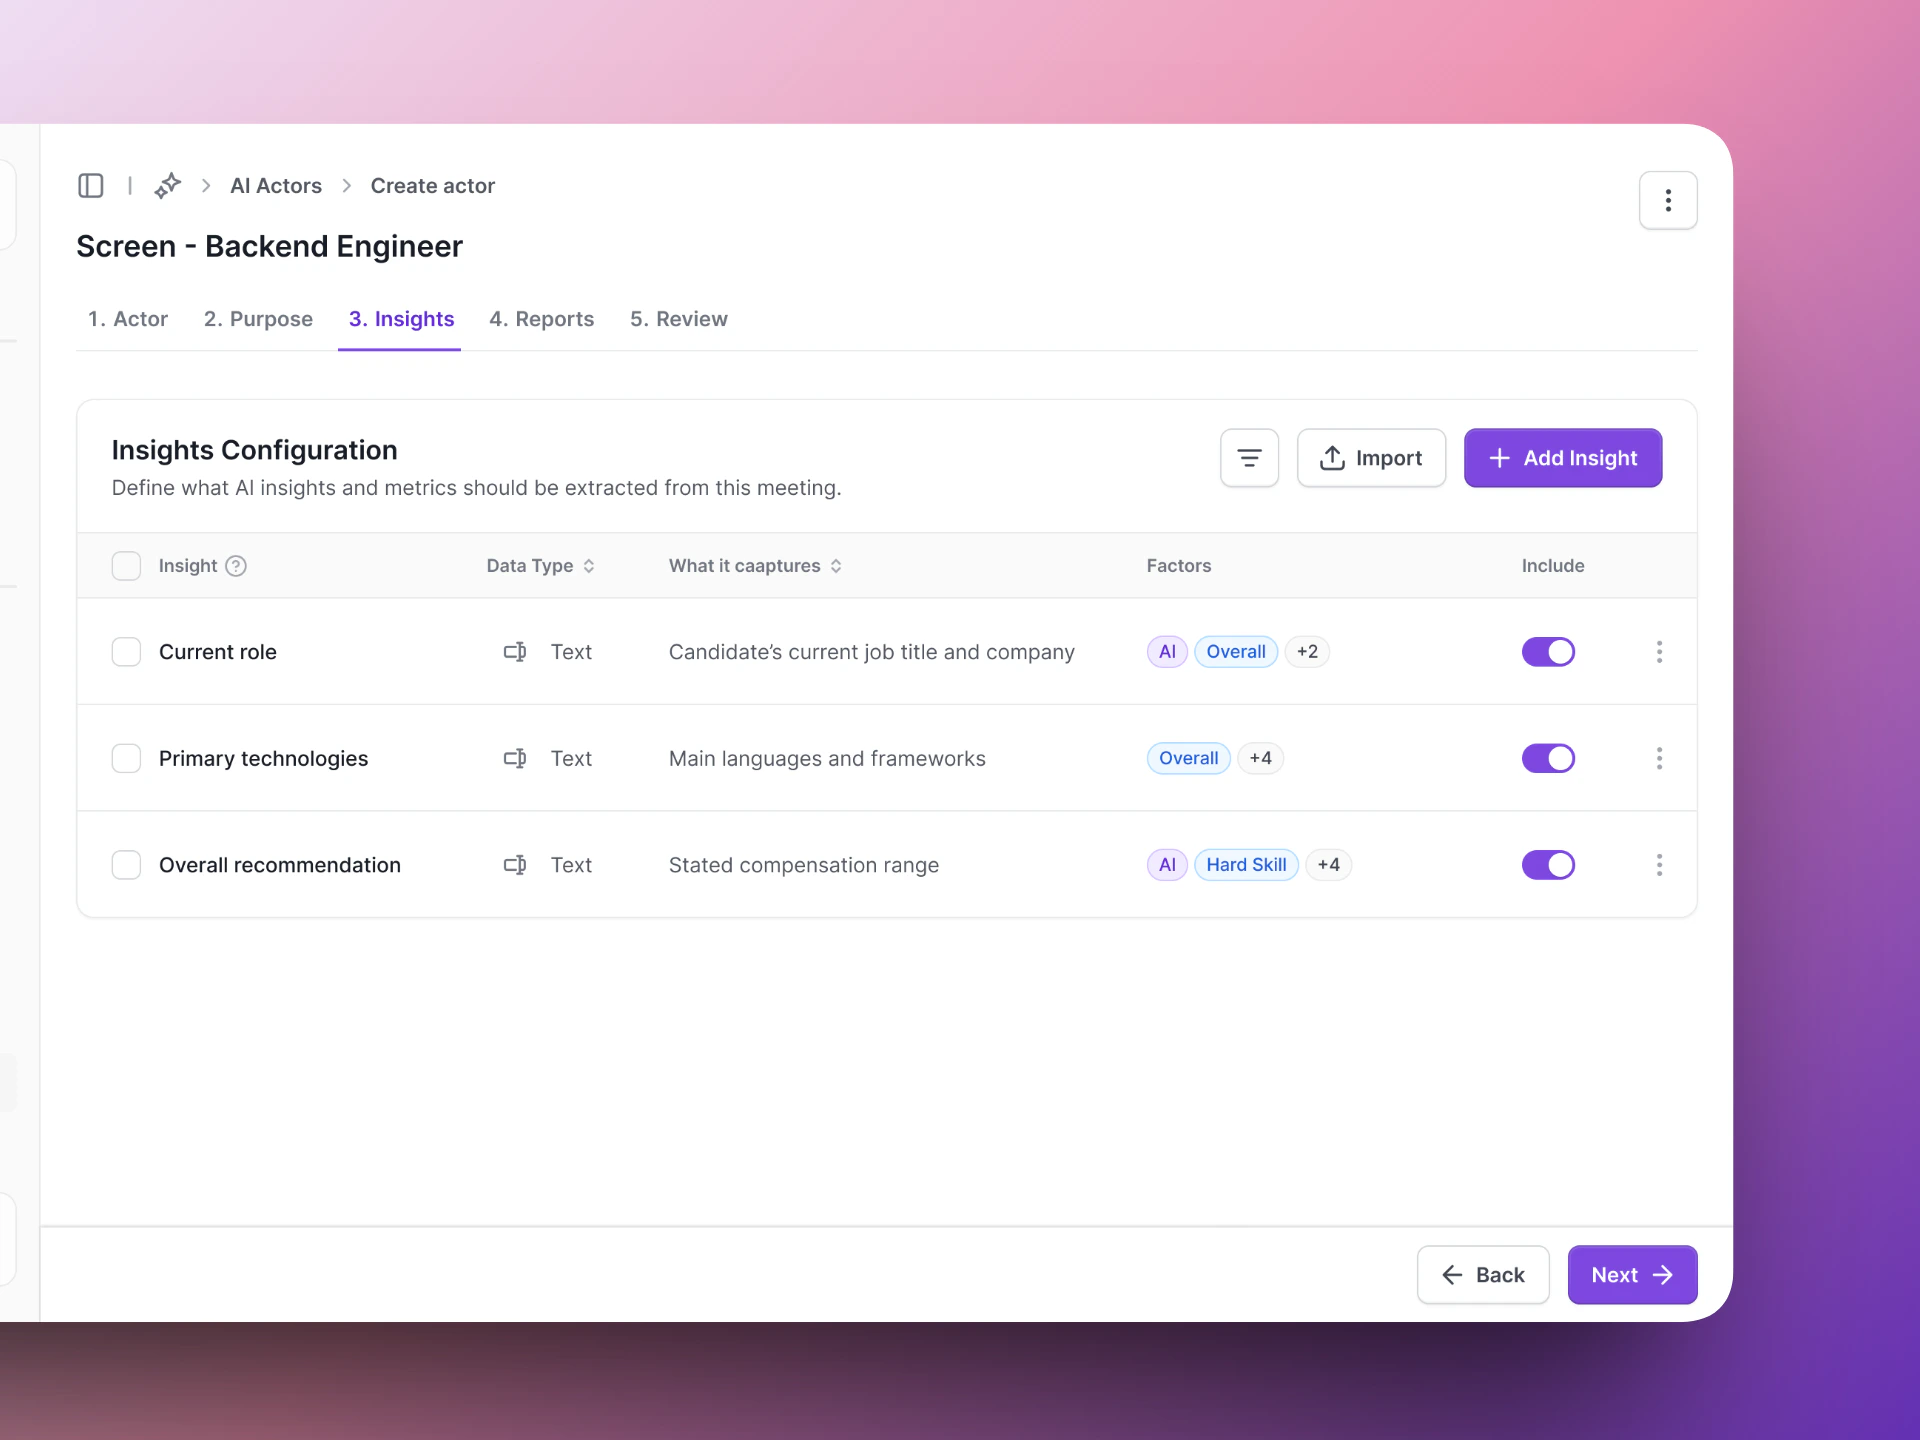
 Define the structured data points Vocalis should pull from each conversation. Click **Add Insight** and set a name, type, and description for each one.
Example insights:
| Insight name | Type | What it captures |
| ---------------------- | ---- | ----------------------------------------- |
| Current role | Text | Candidate's current job title and company |
| Primary technologies | Text | Main languages and frameworks |
| Salary expectations | Text | Stated compensation range |
| Overall recommendation | Text | Strong Yes / Yes / Maybe / No |
Define the structured data points Vocalis should pull from each conversation. Click **Add Insight** and set a name, type, and description for each one.
Example insights:
| Insight name | Type | What it captures |
| ---------------------- | ---- | ----------------------------------------- |
| Current role | Text | Candidate's current job title and company |
| Primary technologies | Text | Main languages and frameworks |
| Salary expectations | Text | Stated compensation range |
| Overall recommendation | Text | Strong Yes / Yes / Maybe / No |
 Configure how interview results are summarized. Review the settings and click **Save** to create your AI Actor.
 ## Test before going live
Before using your AI Actor with real candidates:
1. Create a test meeting with yourself as the participant.
2. Go through the interview as if you were a candidate.
3. Review the transcript and insights — adjust as needed.
## Next steps
Put your AI Actor to work.
Write better instructions for your AI Actors.
## Test before going live
Before using your AI Actor with real candidates:
1. Create a test meeting with yourself as the participant.
2. Go through the interview as if you were a candidate.
3. Review the transcript and insights — adjust as needed.
## Next steps
Put your AI Actor to work.
Write better instructions for your AI Actors.