> ## Documentation Index
> Fetch the complete documentation index at: https://docs.witting.ai/llms.txt
> Use this file to discover all available pages before exploring further.
# Vocalis Quick Start
> Go from zero to your first AI-conducted interview in minutes. Create an AI Actor, schedule a meeting on Google Meet or phone, and review structured results.
This guide walks you through setting up an AI Actor and creating your first conversation — either on Google Meet or by phone. The whole process takes minutes, and you do not need any technical skills or developer support.
## Prerequisites
Before you start, make sure you have:
* A Vocalis account ([sign up at vocalis.witting.ai](https://vocalis.witting.ai))
* Google Workspace configured for Vocalis ([setup guide](/vocalis/setup/google-workspace))
Twilio is only needed if you want phone call interviews. Google Meet interviews work without it.
## Step 1: Log in to Vocalis
Go to [vocalis.witting.ai](https://vocalis.witting.ai) and log in. You will land on the Dashboard.
 ## Step 2: Create an AI Actor
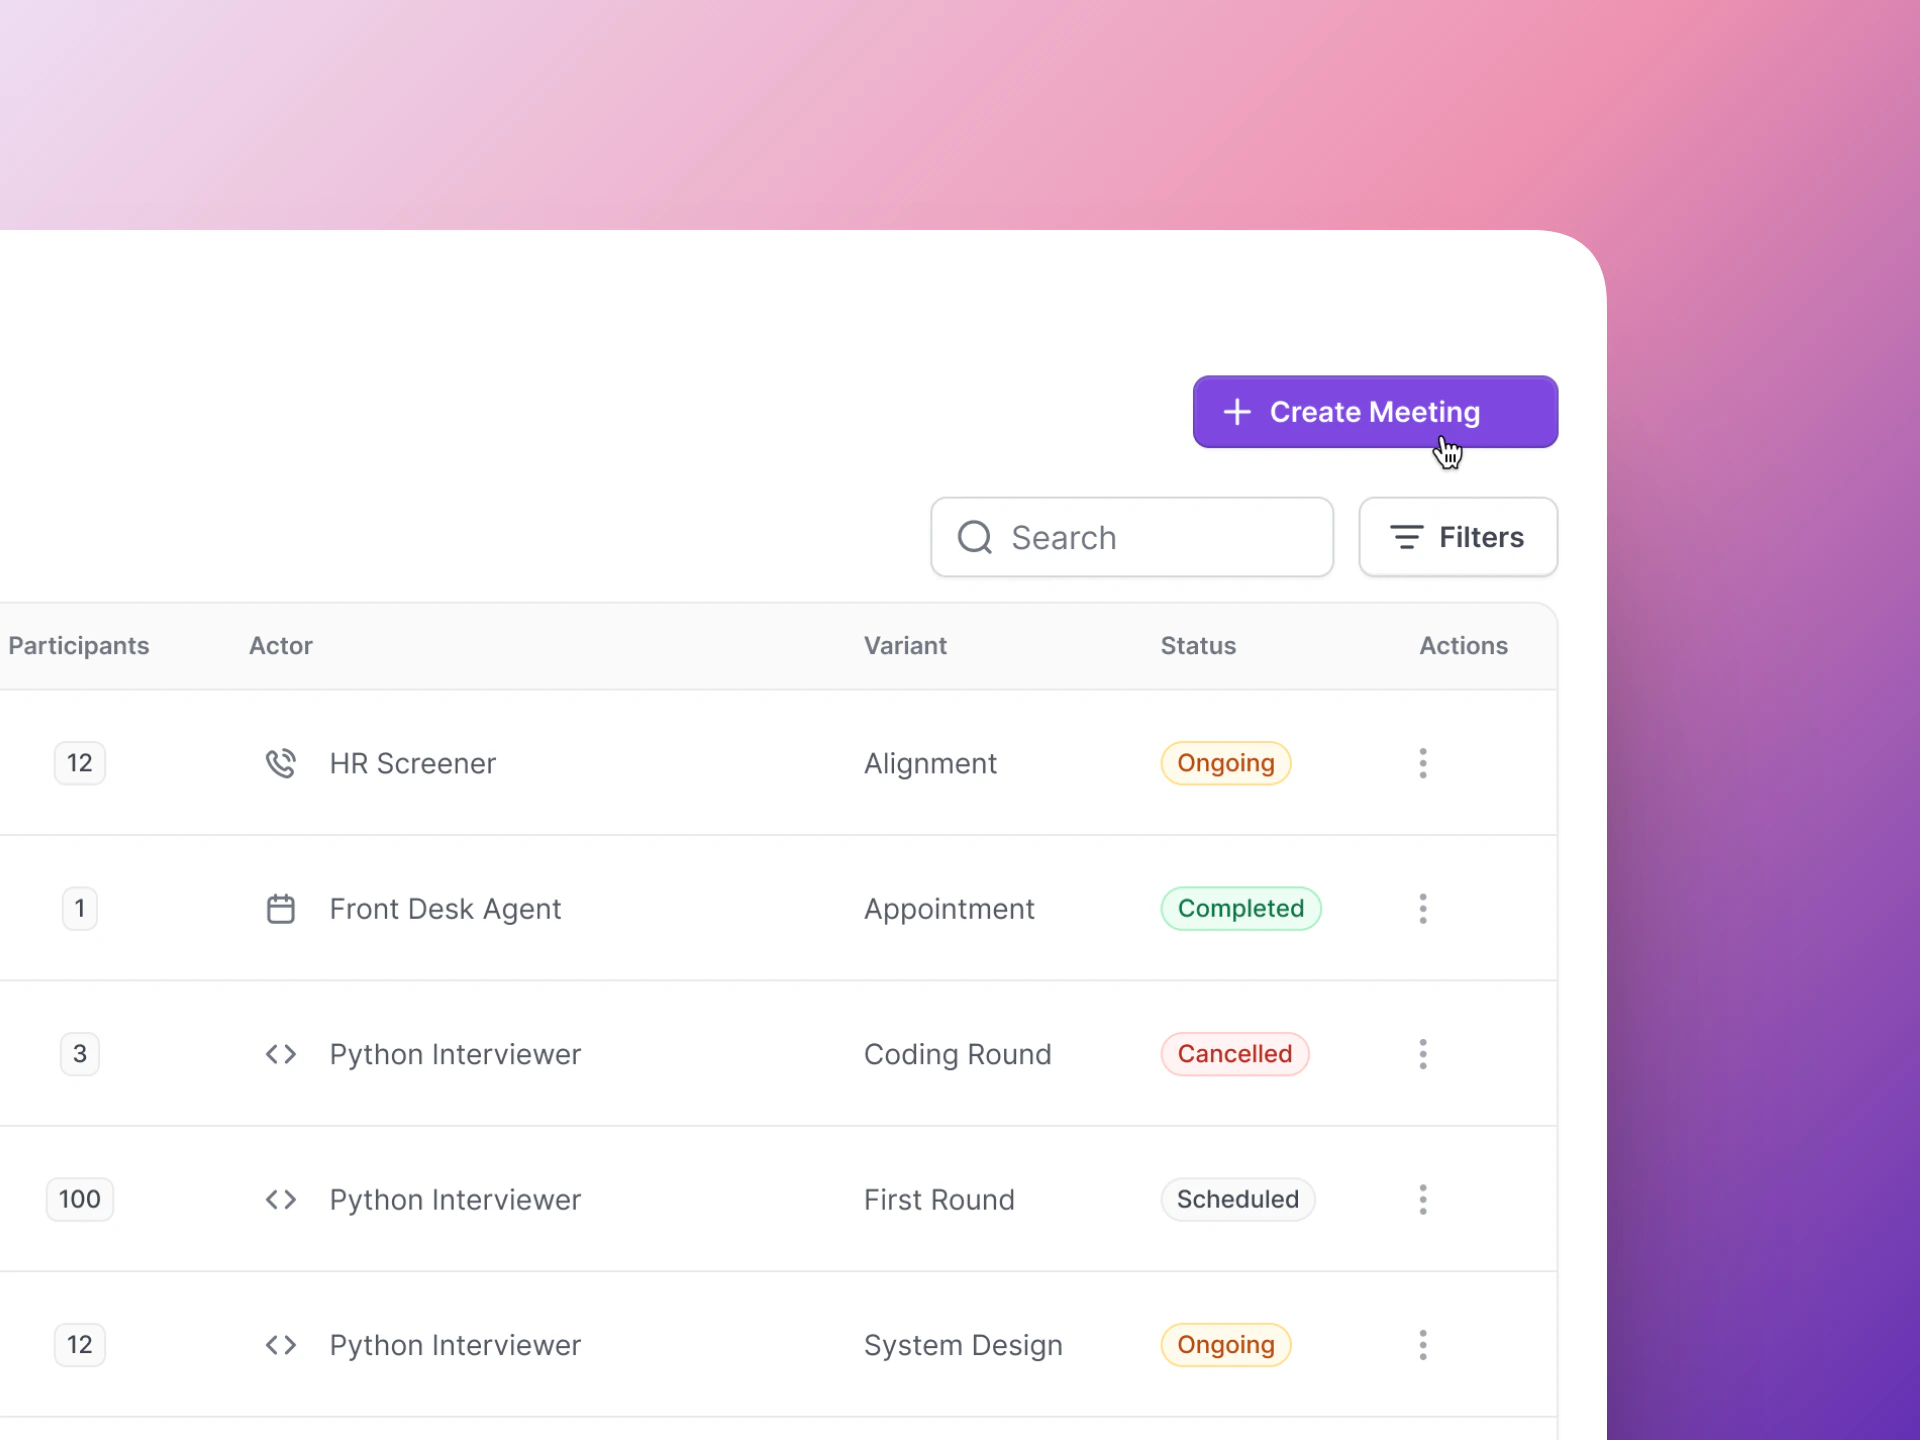
Click **AI Actors** in the left sidebar. This is where all your AI interviewers live.
## Step 2: Create an AI Actor
Click **AI Actors** in the left sidebar. This is where all your AI interviewers live.
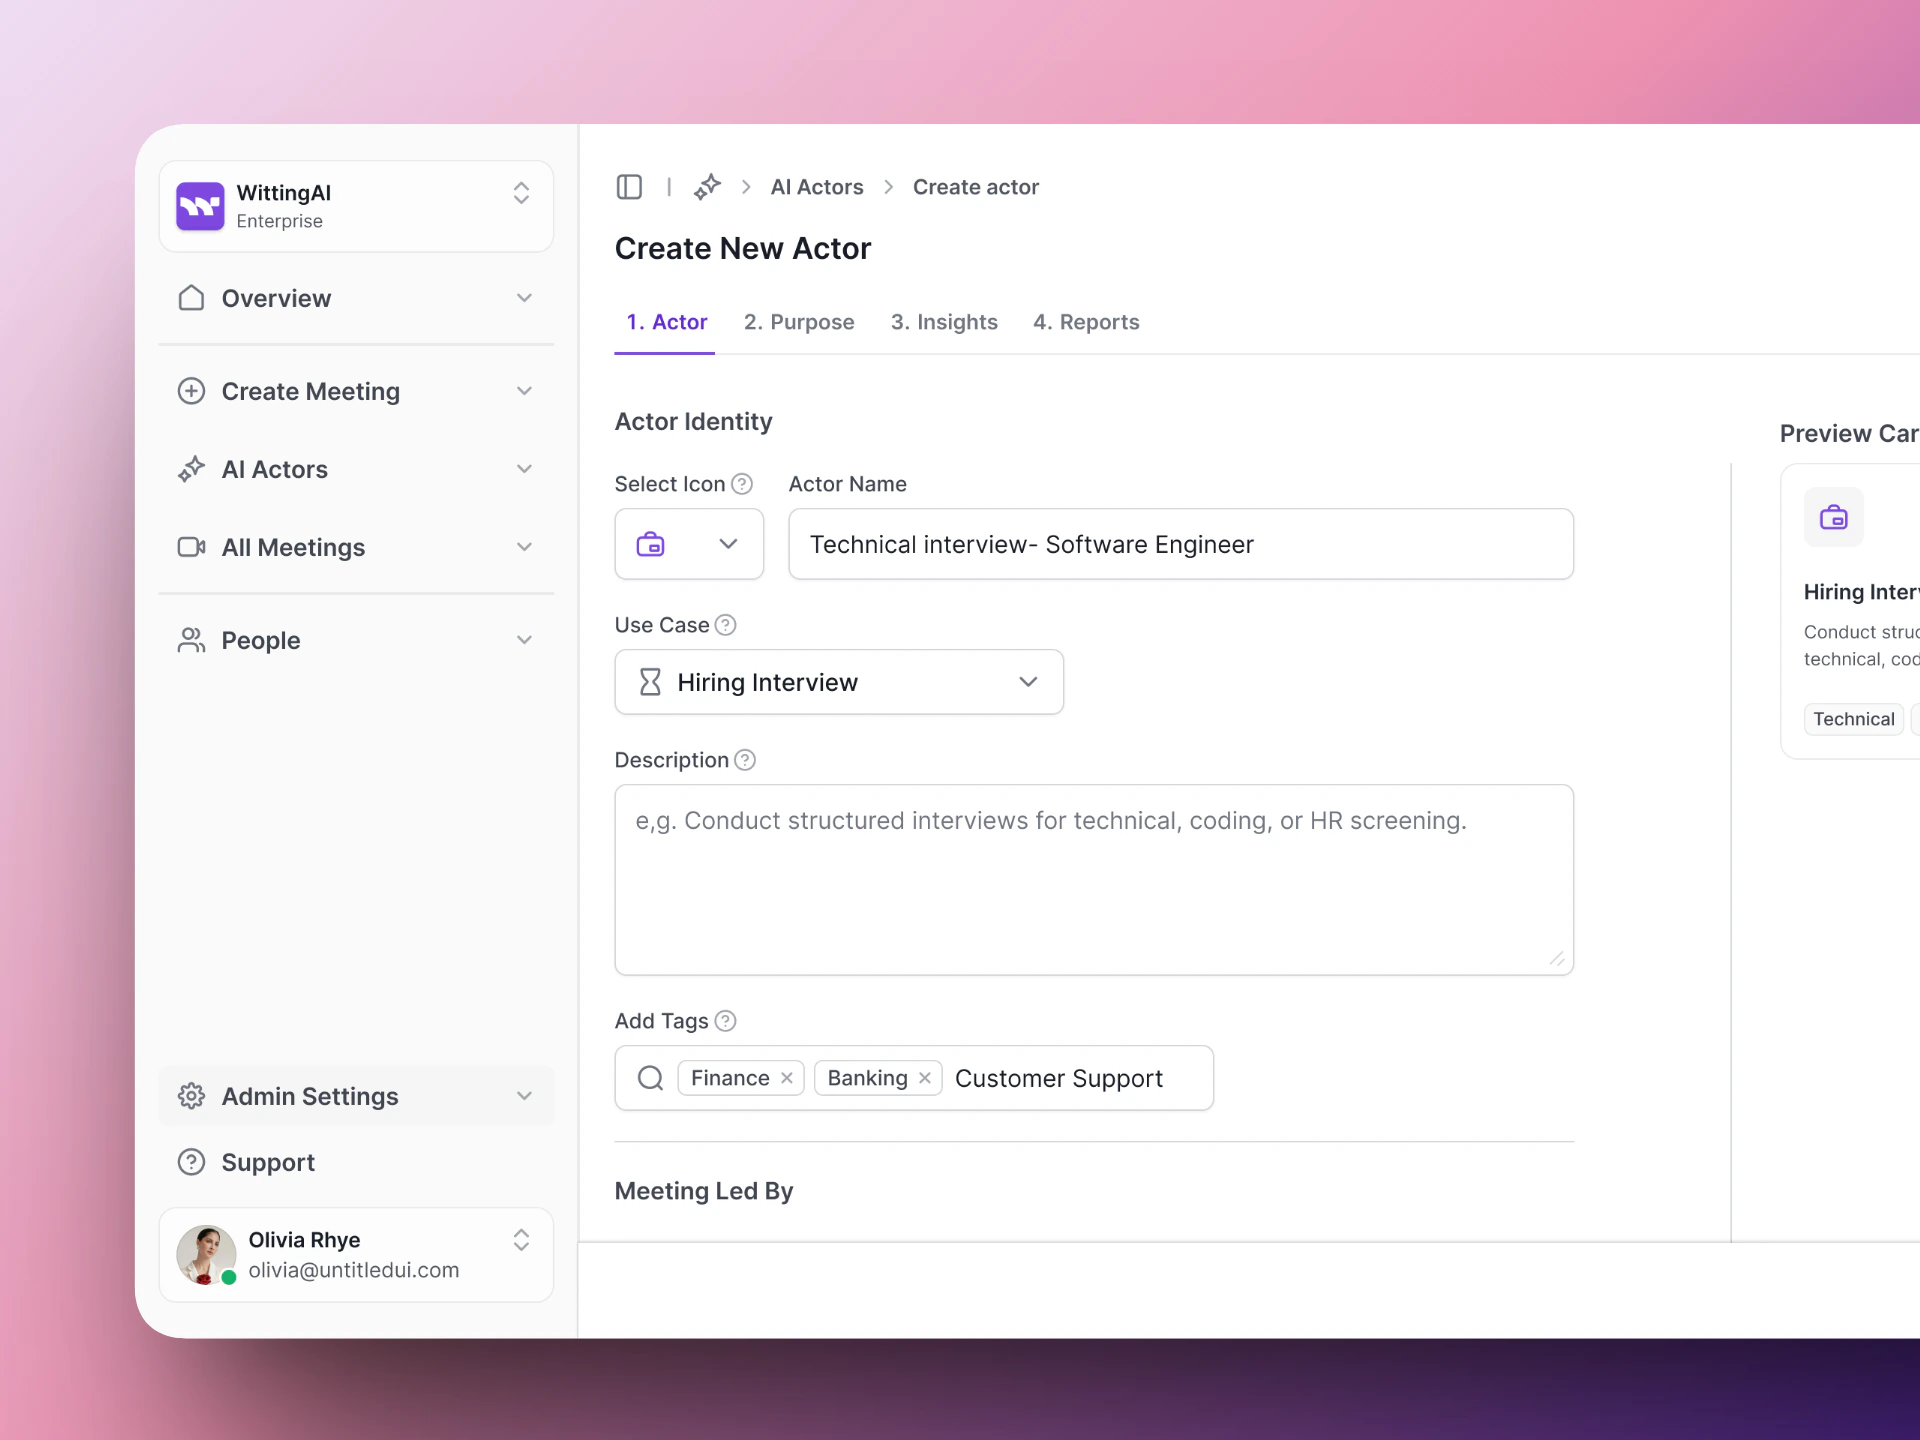
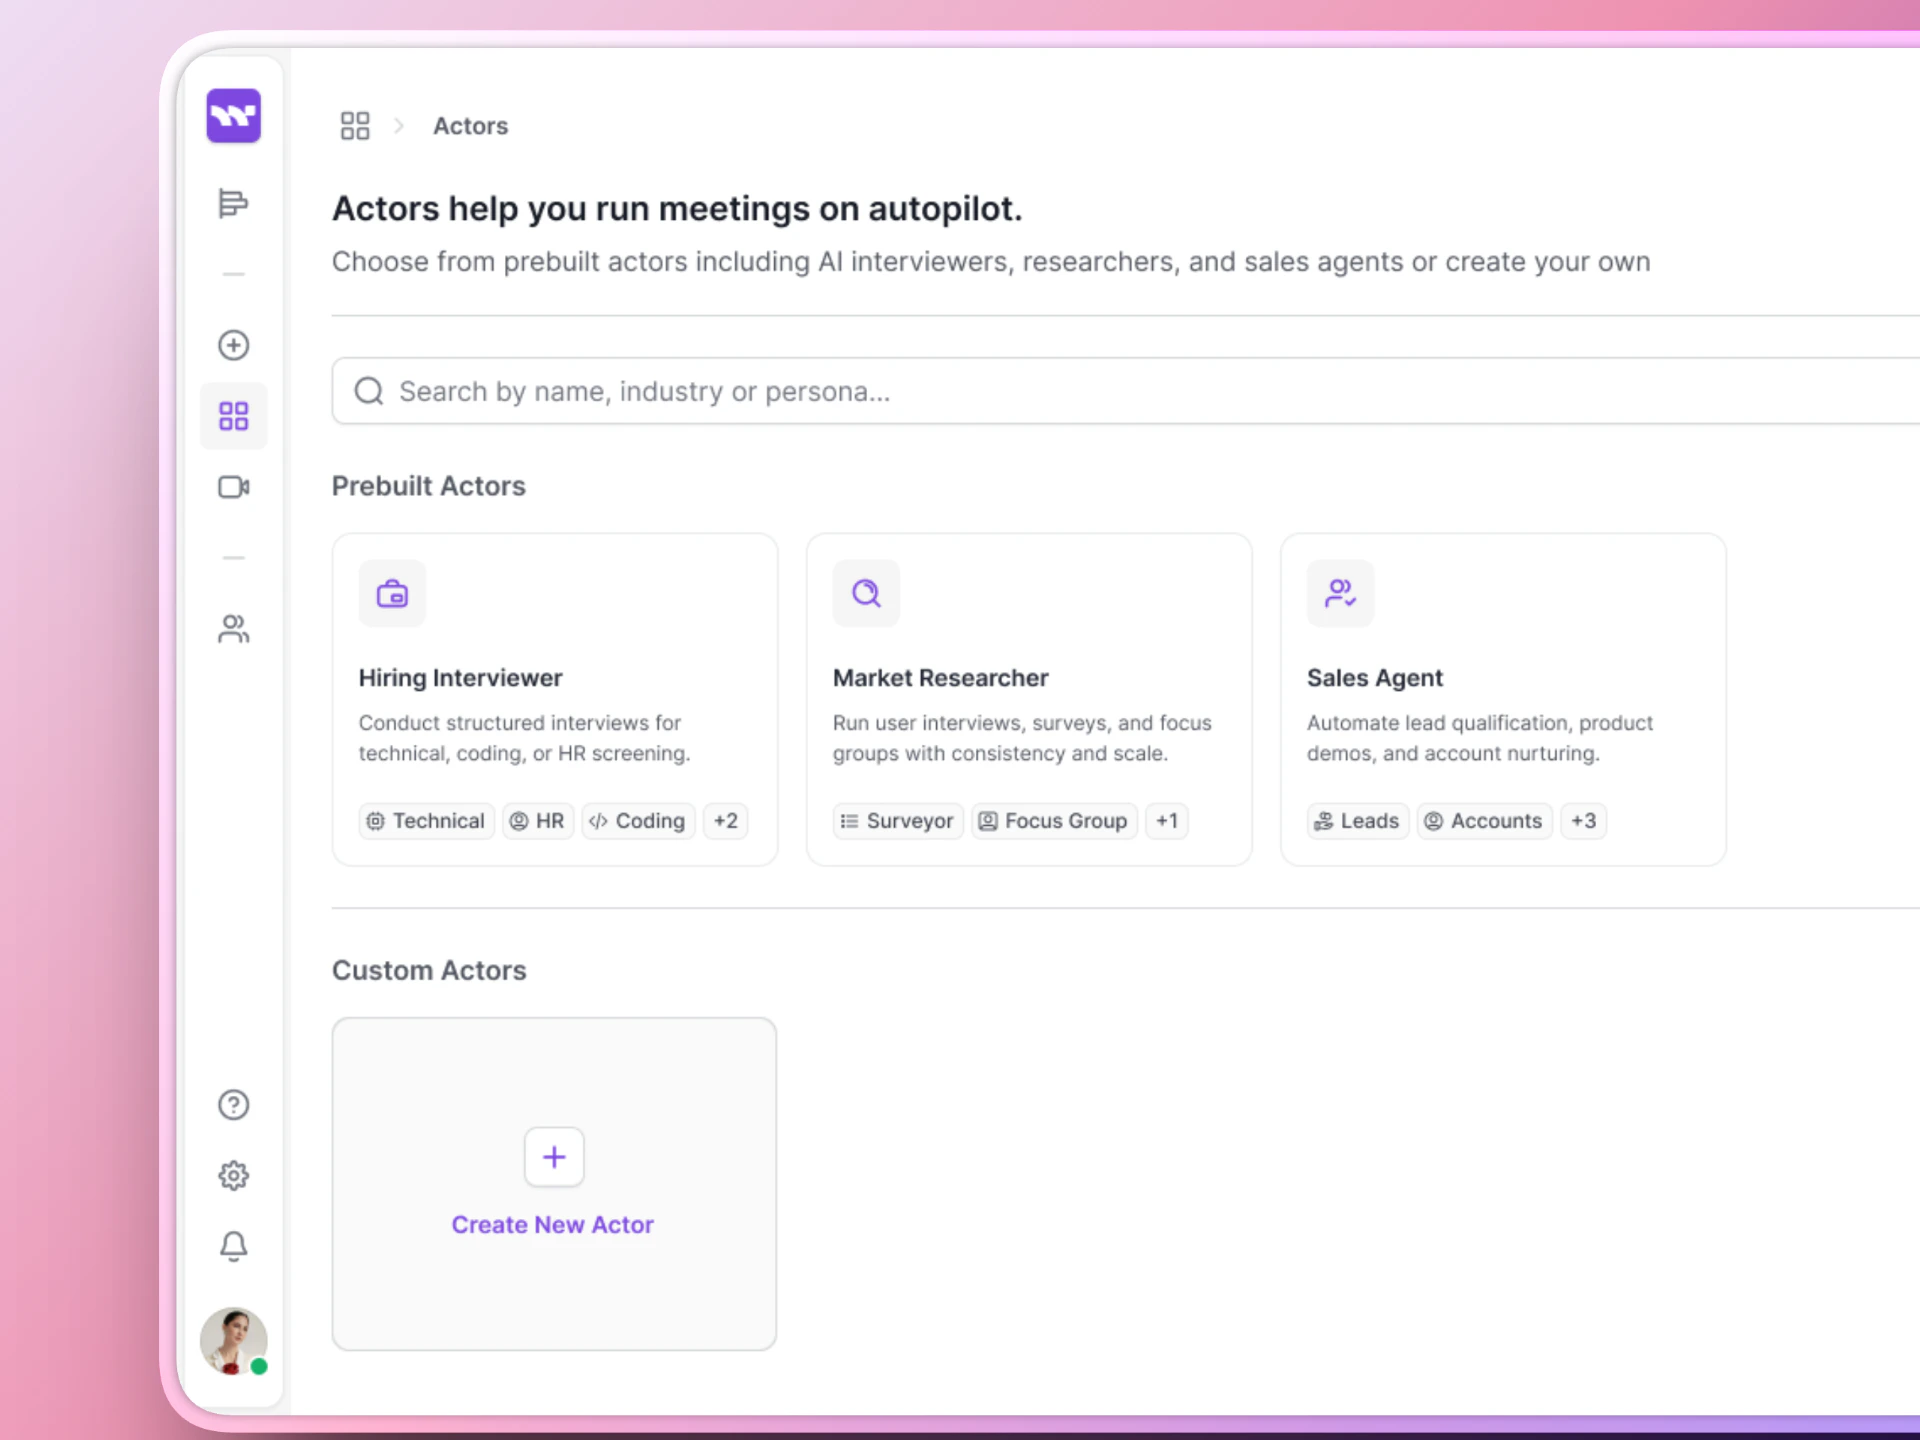 Click the **Create Actor** button to start the setup wizard.
Fill in the basics:
* **Name**: A display name for your team (e.g., "Technical Interview - Software Engineer")
* **Voice**: Pick the voice your AI Actor will speak with
* **Conversational style**: Set the tone and speaking speed
Click the **Create Actor** button to start the setup wizard.
Fill in the basics:
* **Name**: A display name for your team (e.g., "Technical Interview - Software Engineer")
* **Voice**: Pick the voice your AI Actor will speak with
* **Conversational style**: Set the tone and speaking speed
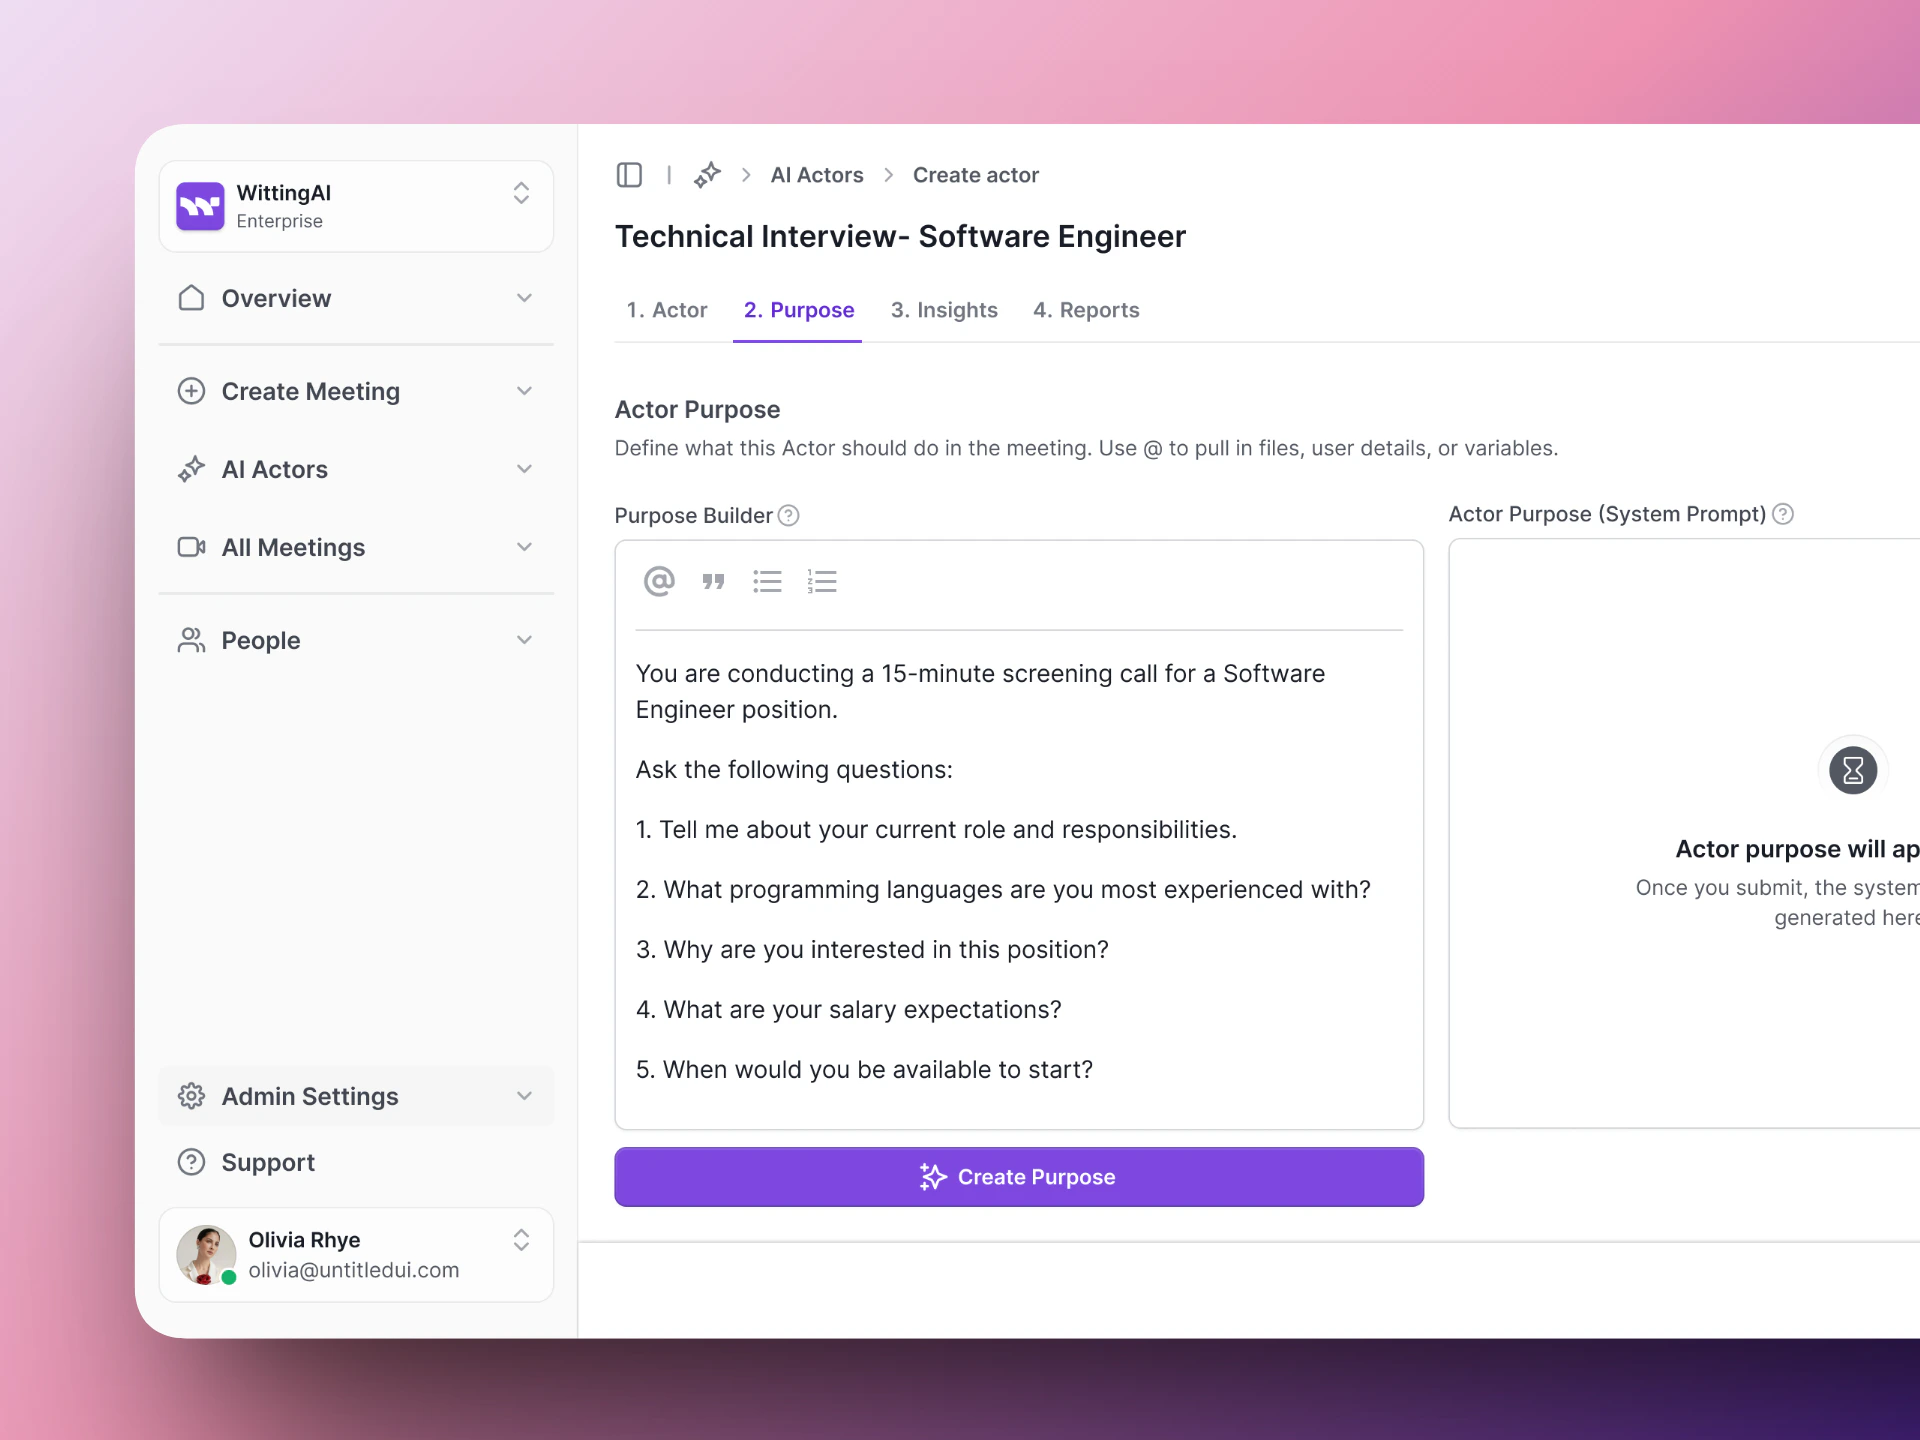
 Write the instructions that tell the AI what to do during the interview. Here is a simple starting point:
```
You are conducting a 15-minute screening call for a Software Engineer position.
Ask the following questions:
1. Tell me about your current role and responsibilities.
2. What programming languages are you most experienced with?
3. Why are you interested in this position?
4. What are your salary expectations?
5. When would you be available to start?
Be friendly and conversational. If the candidate gives a short answer,
ask a brief follow-up to get more detail.
```
Write the instructions that tell the AI what to do during the interview. Here is a simple starting point:
```
You are conducting a 15-minute screening call for a Software Engineer position.
Ask the following questions:
1. Tell me about your current role and responsibilities.
2. What programming languages are you most experienced with?
3. Why are you interested in this position?
4. What are your salary expectations?
5. When would you be available to start?
Be friendly and conversational. If the candidate gives a short answer,
ask a brief follow-up to get more detail.
```
 Define the data points you want extracted from the conversation:
* "Current role" (text)
* "Primary languages" (text)
* "Salary expectations" (text)
* "Available start date" (text)
* "Overall recommendation" (score)
Define the data points you want extracted from the conversation:
* "Current role" (text)
* "Primary languages" (text)
* "Salary expectations" (text)
* "Available start date" (text)
* "Overall recommendation" (score)
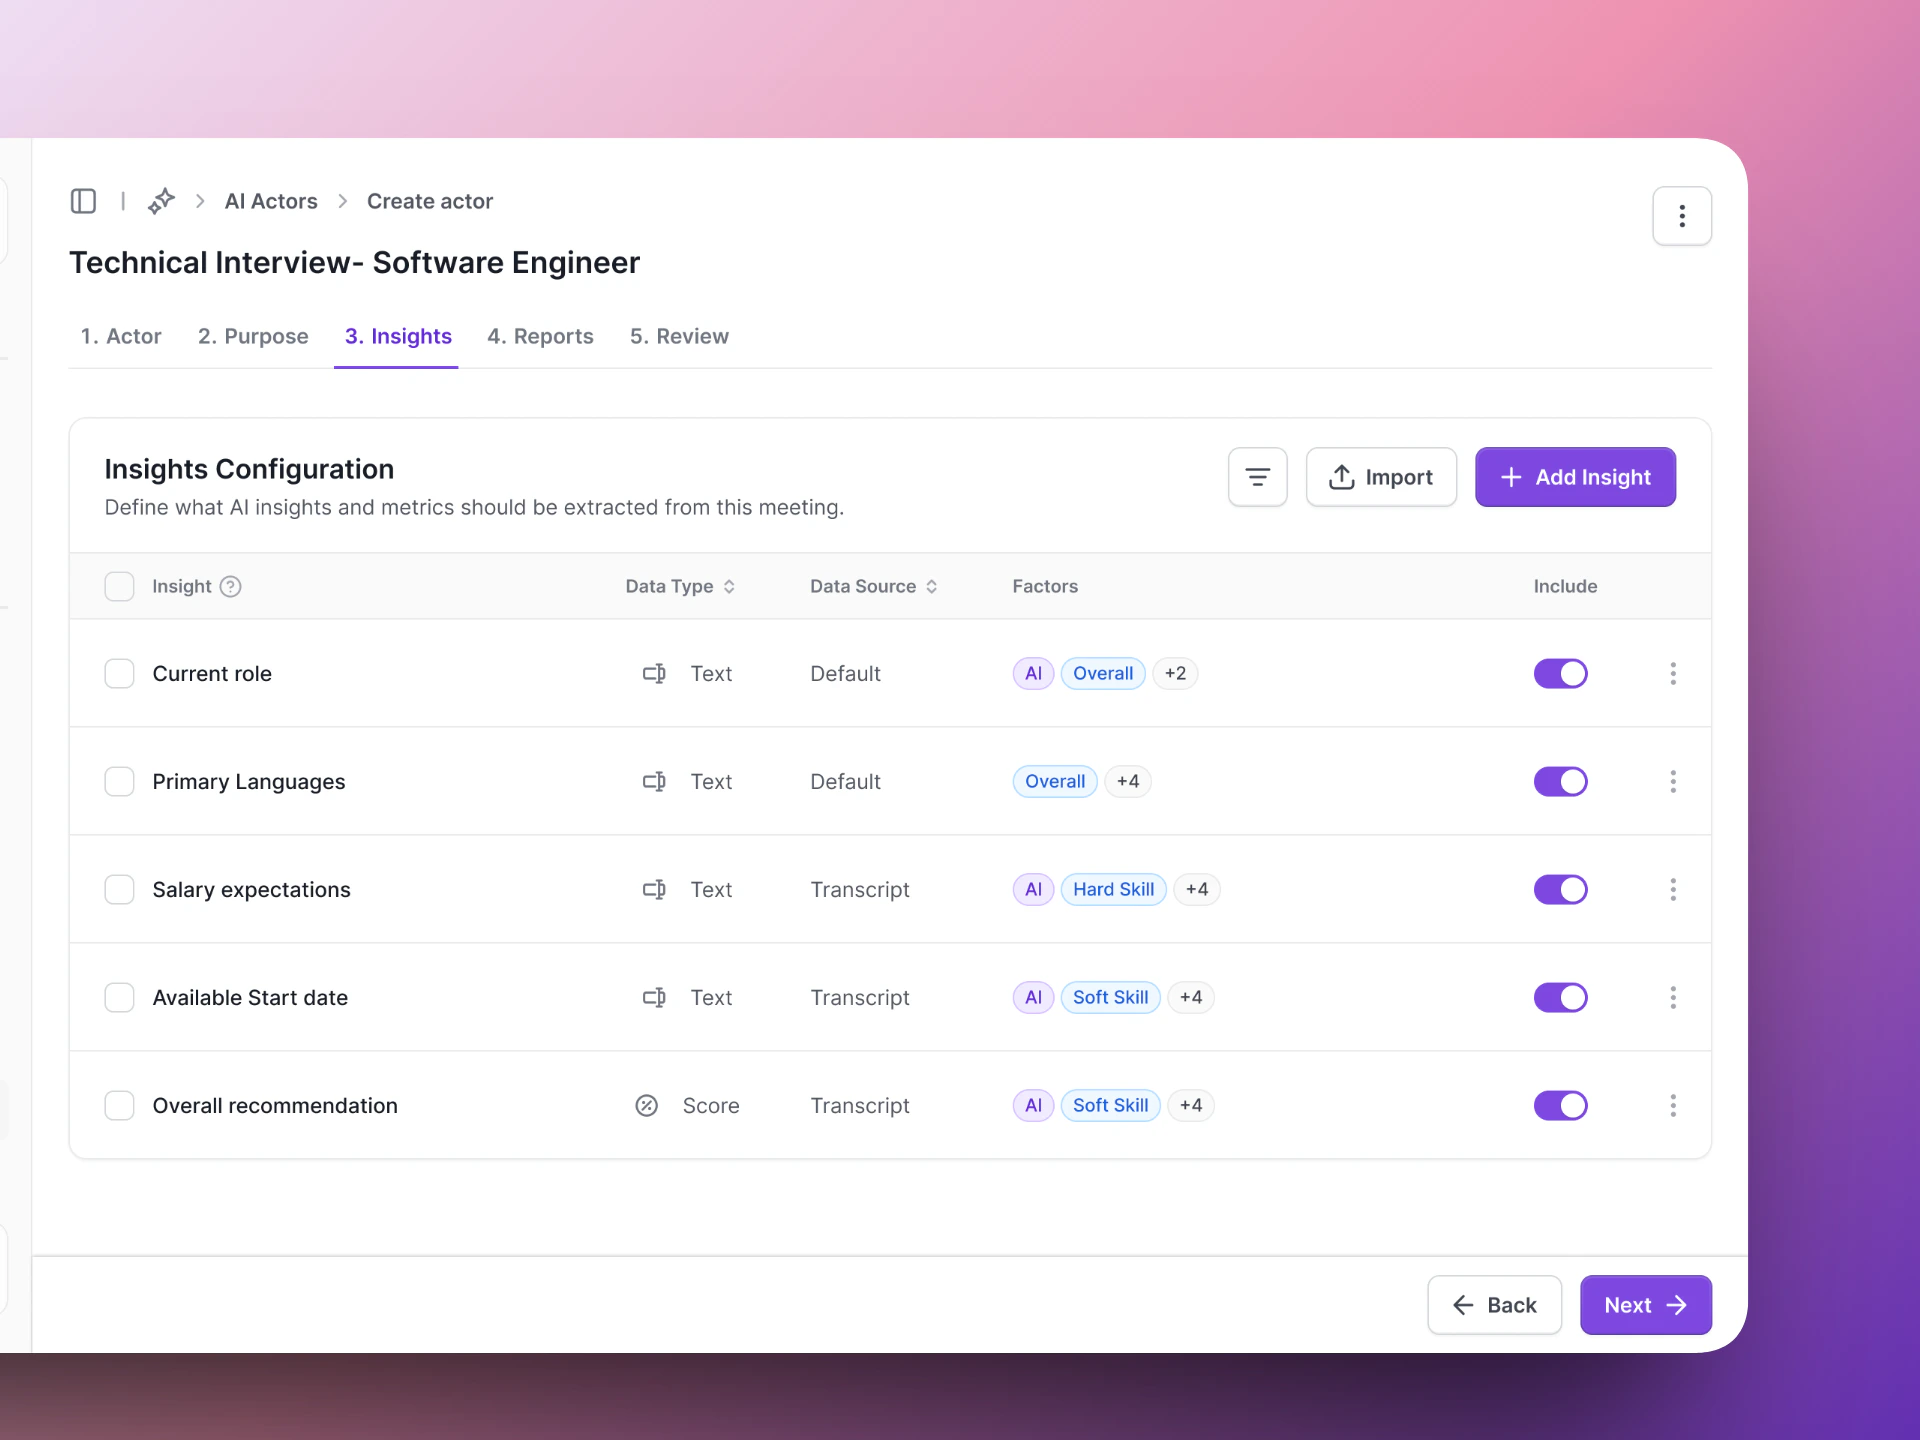 Configure how the results are summarized. Review the settings and click **Save** to create your AI Actor.
 For a deeper walkthrough, see [Create Your First AI Actor](/vocalis/getting-started/create-first-actor).
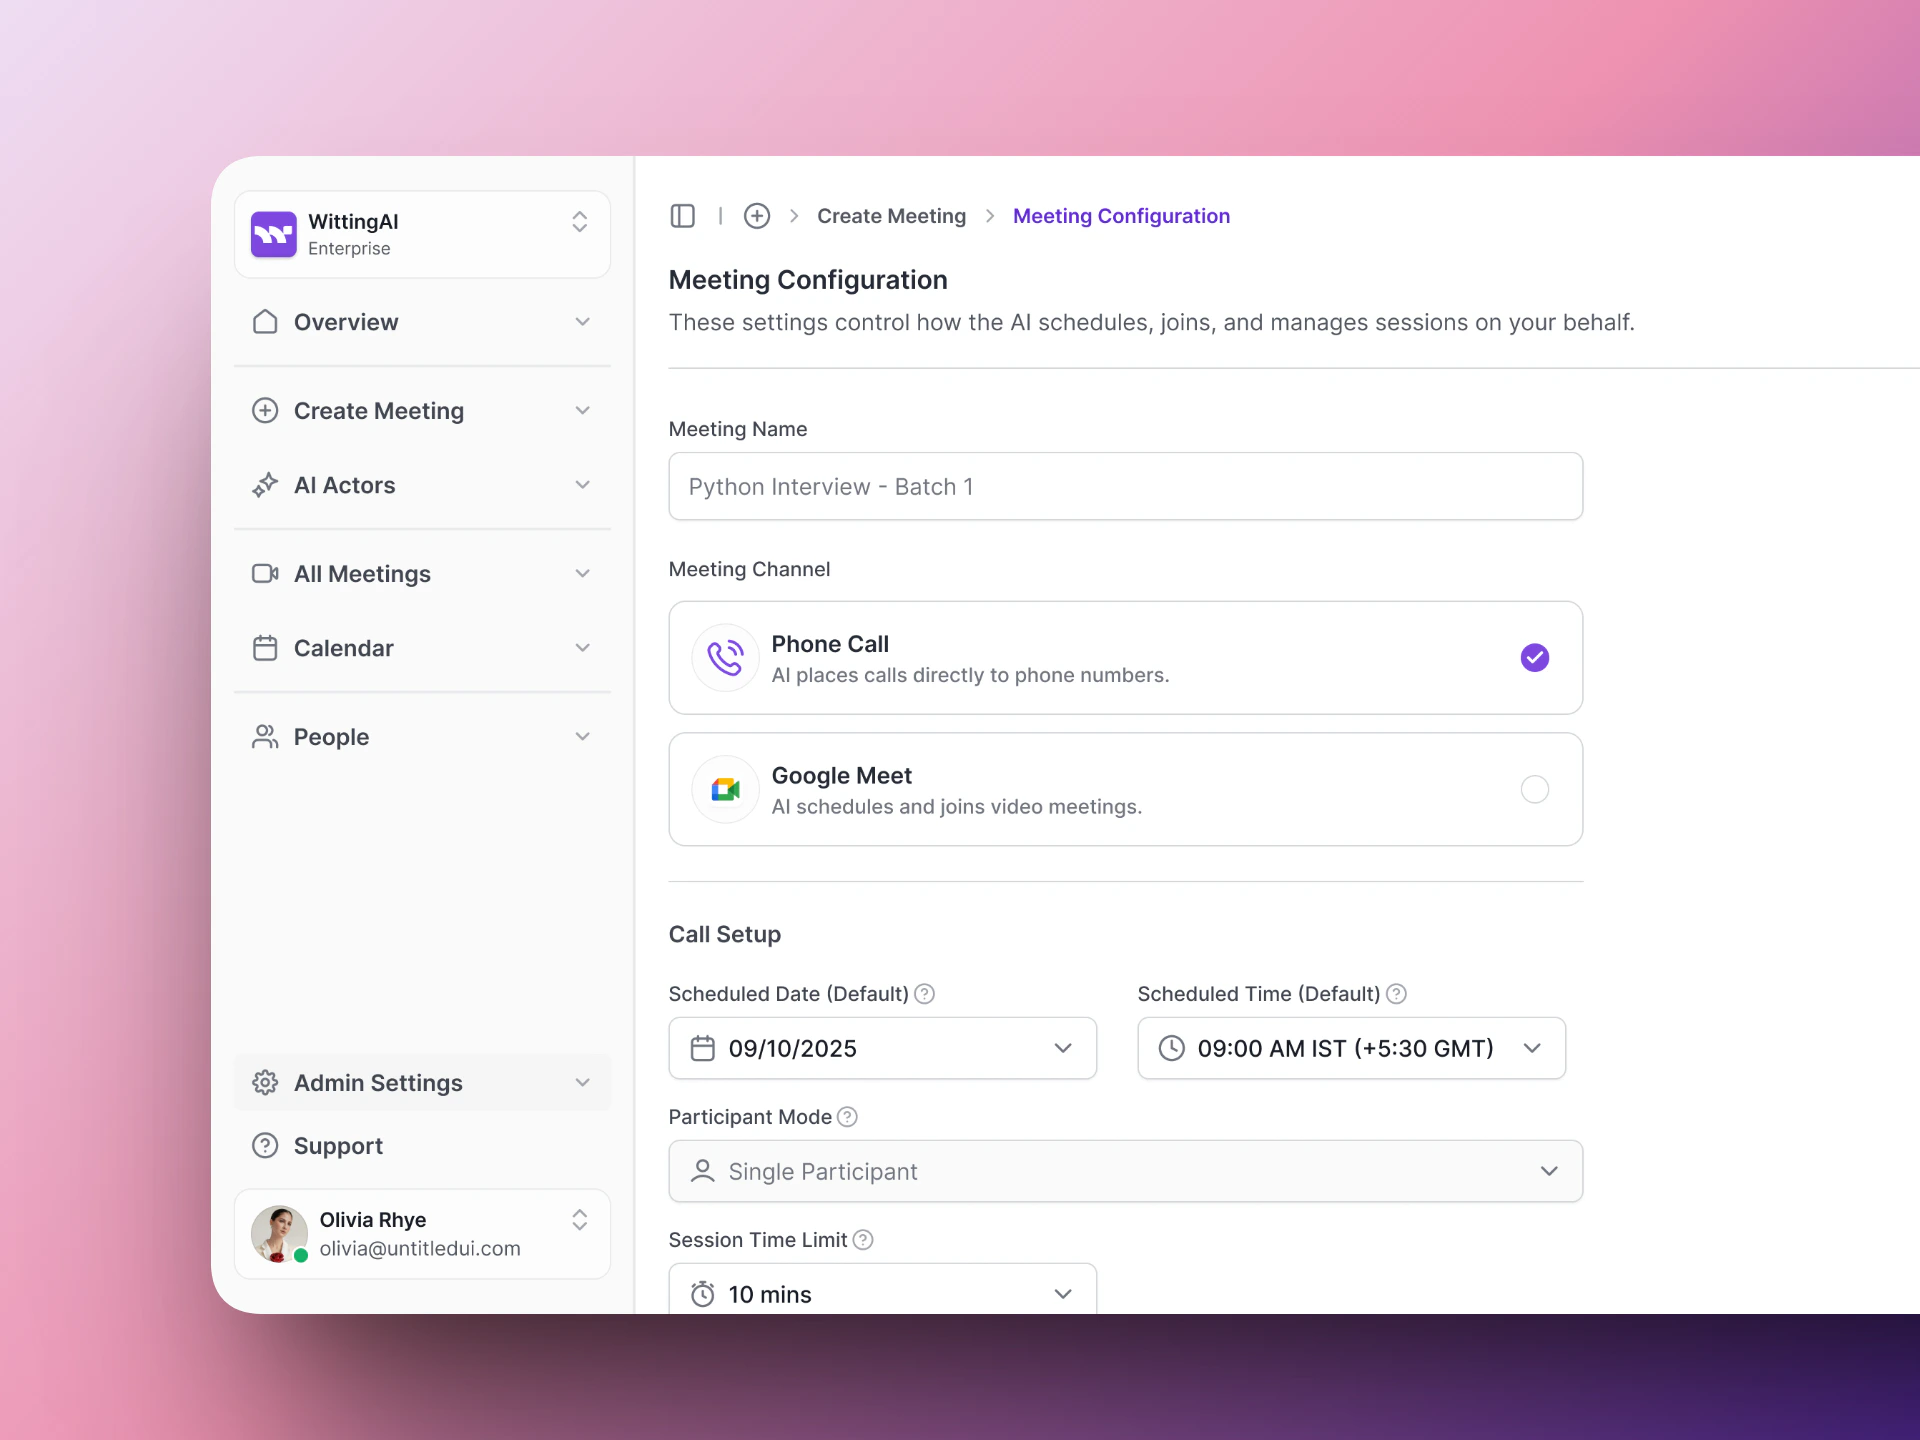
## Step 3: Create a meeting
Click the **Create Meeting** button (top right of the page).
For a deeper walkthrough, see [Create Your First AI Actor](/vocalis/getting-started/create-first-actor).
## Step 3: Create a meeting
Click the **Create Meeting** button (top right of the page).
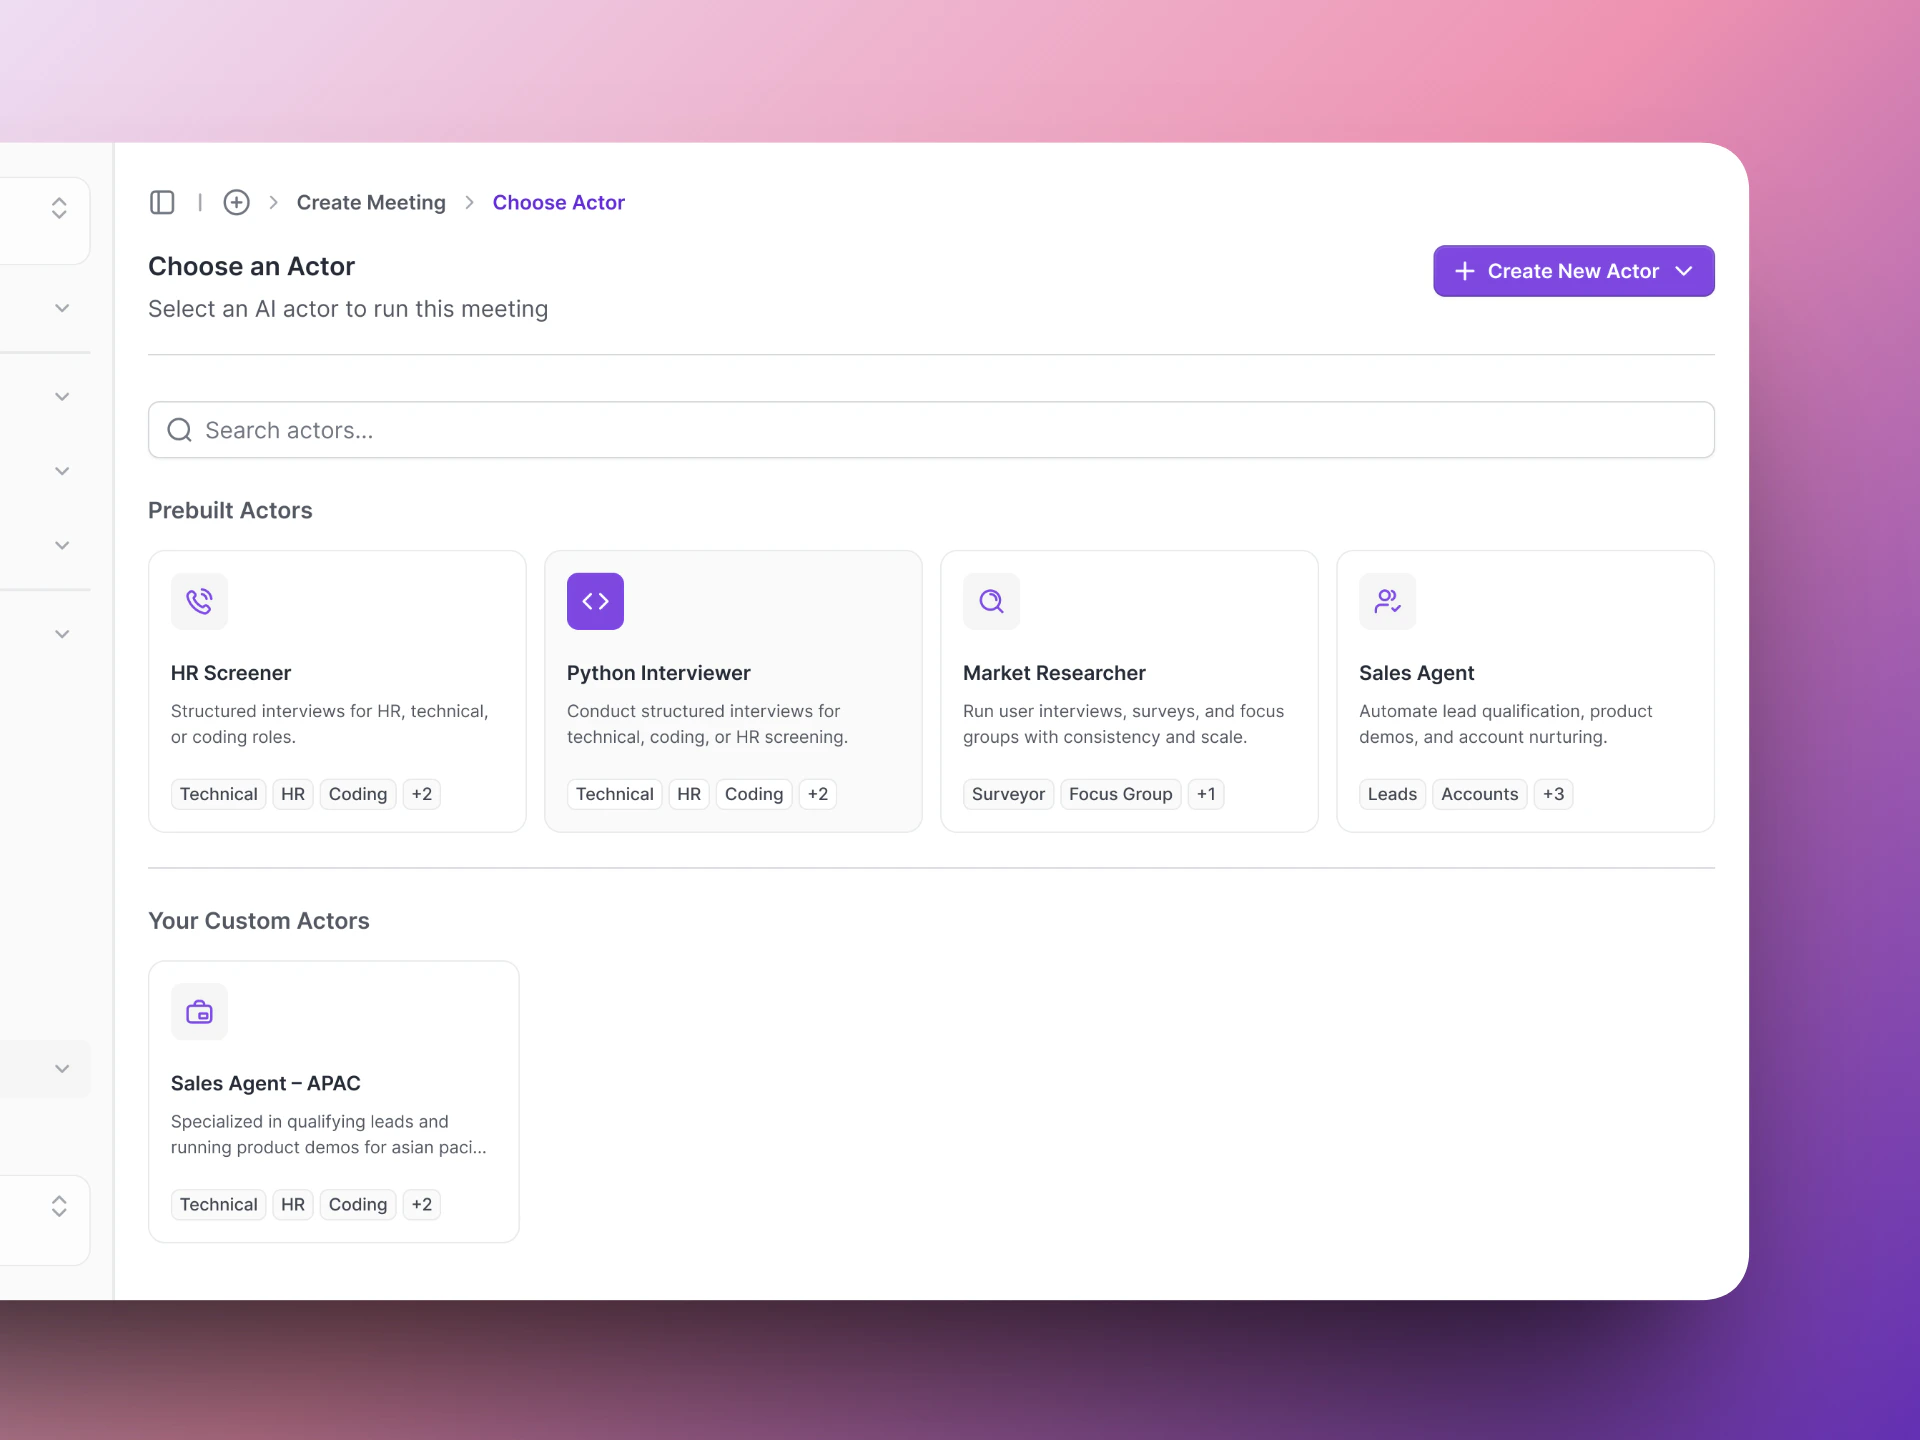
 Select the AI Actor you just created. If you have variants (modified versions), pick the one you want.
 * **Meeting Channel**: Choose **Google Meet** or **Phone Call**
* **Date and time**: When the interview should happen
* **Meeting name**: Give it a name for easy reference
* **Meeting Channel**: Choose **Google Meet** or **Phone Call**
* **Date and time**: When the interview should happen
* **Meeting name**: Give it a name for easy reference
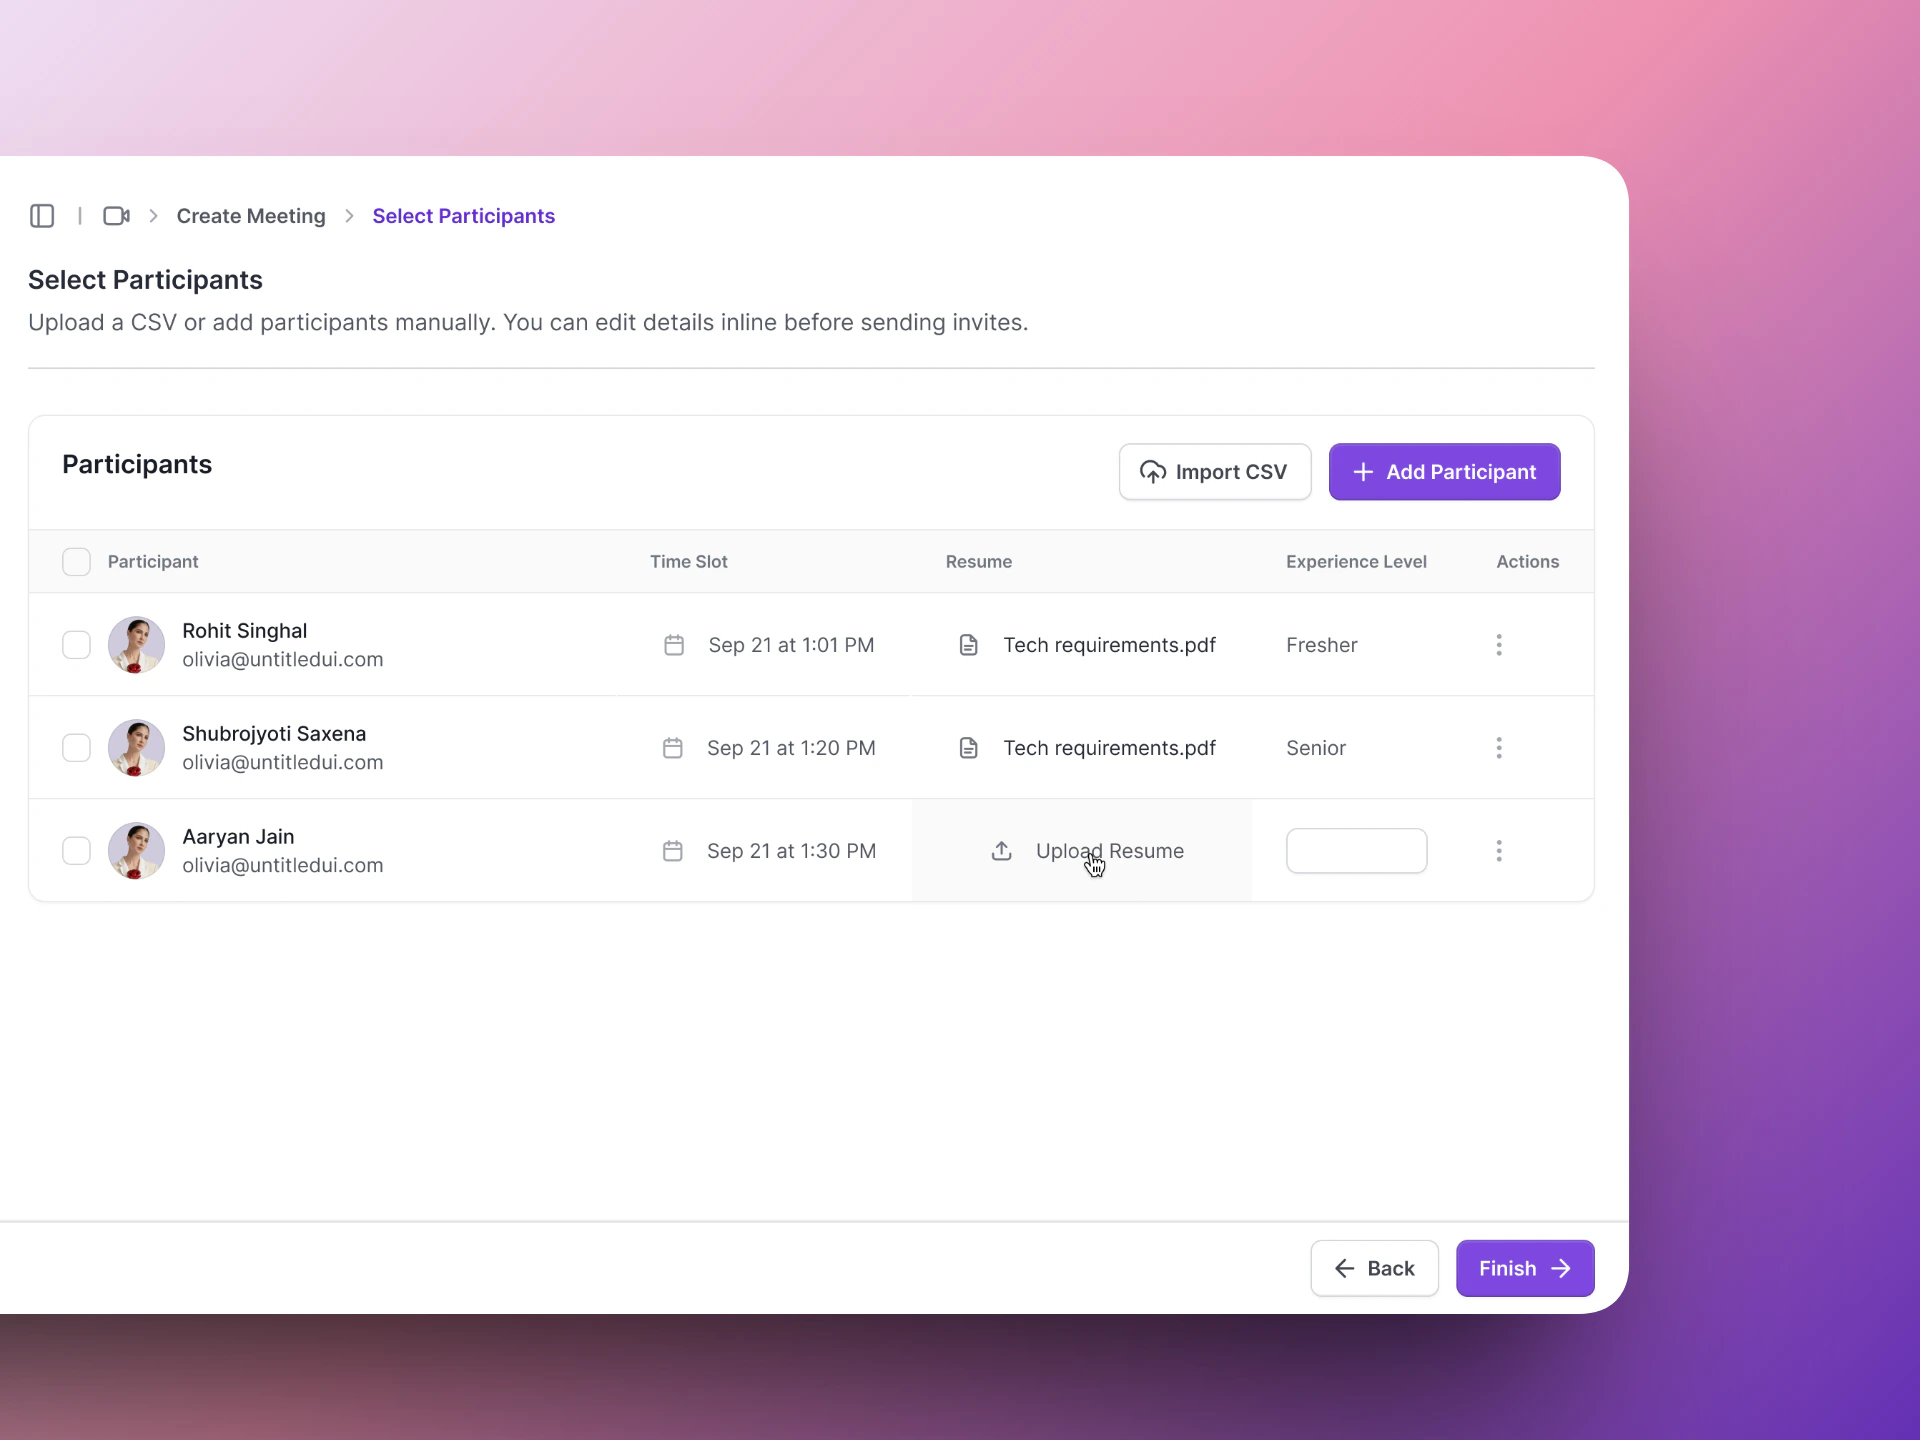
 Add the candidate's name and contact details (email for Google Meet, phone number for phone calls). Click **Create** to finalize.
 Vocalis creates the meeting, sends the invite, and schedules the AI Actor to join at the right time.
For more detail, see [Create a Meeting](/vocalis/getting-started/schedule-meeting).
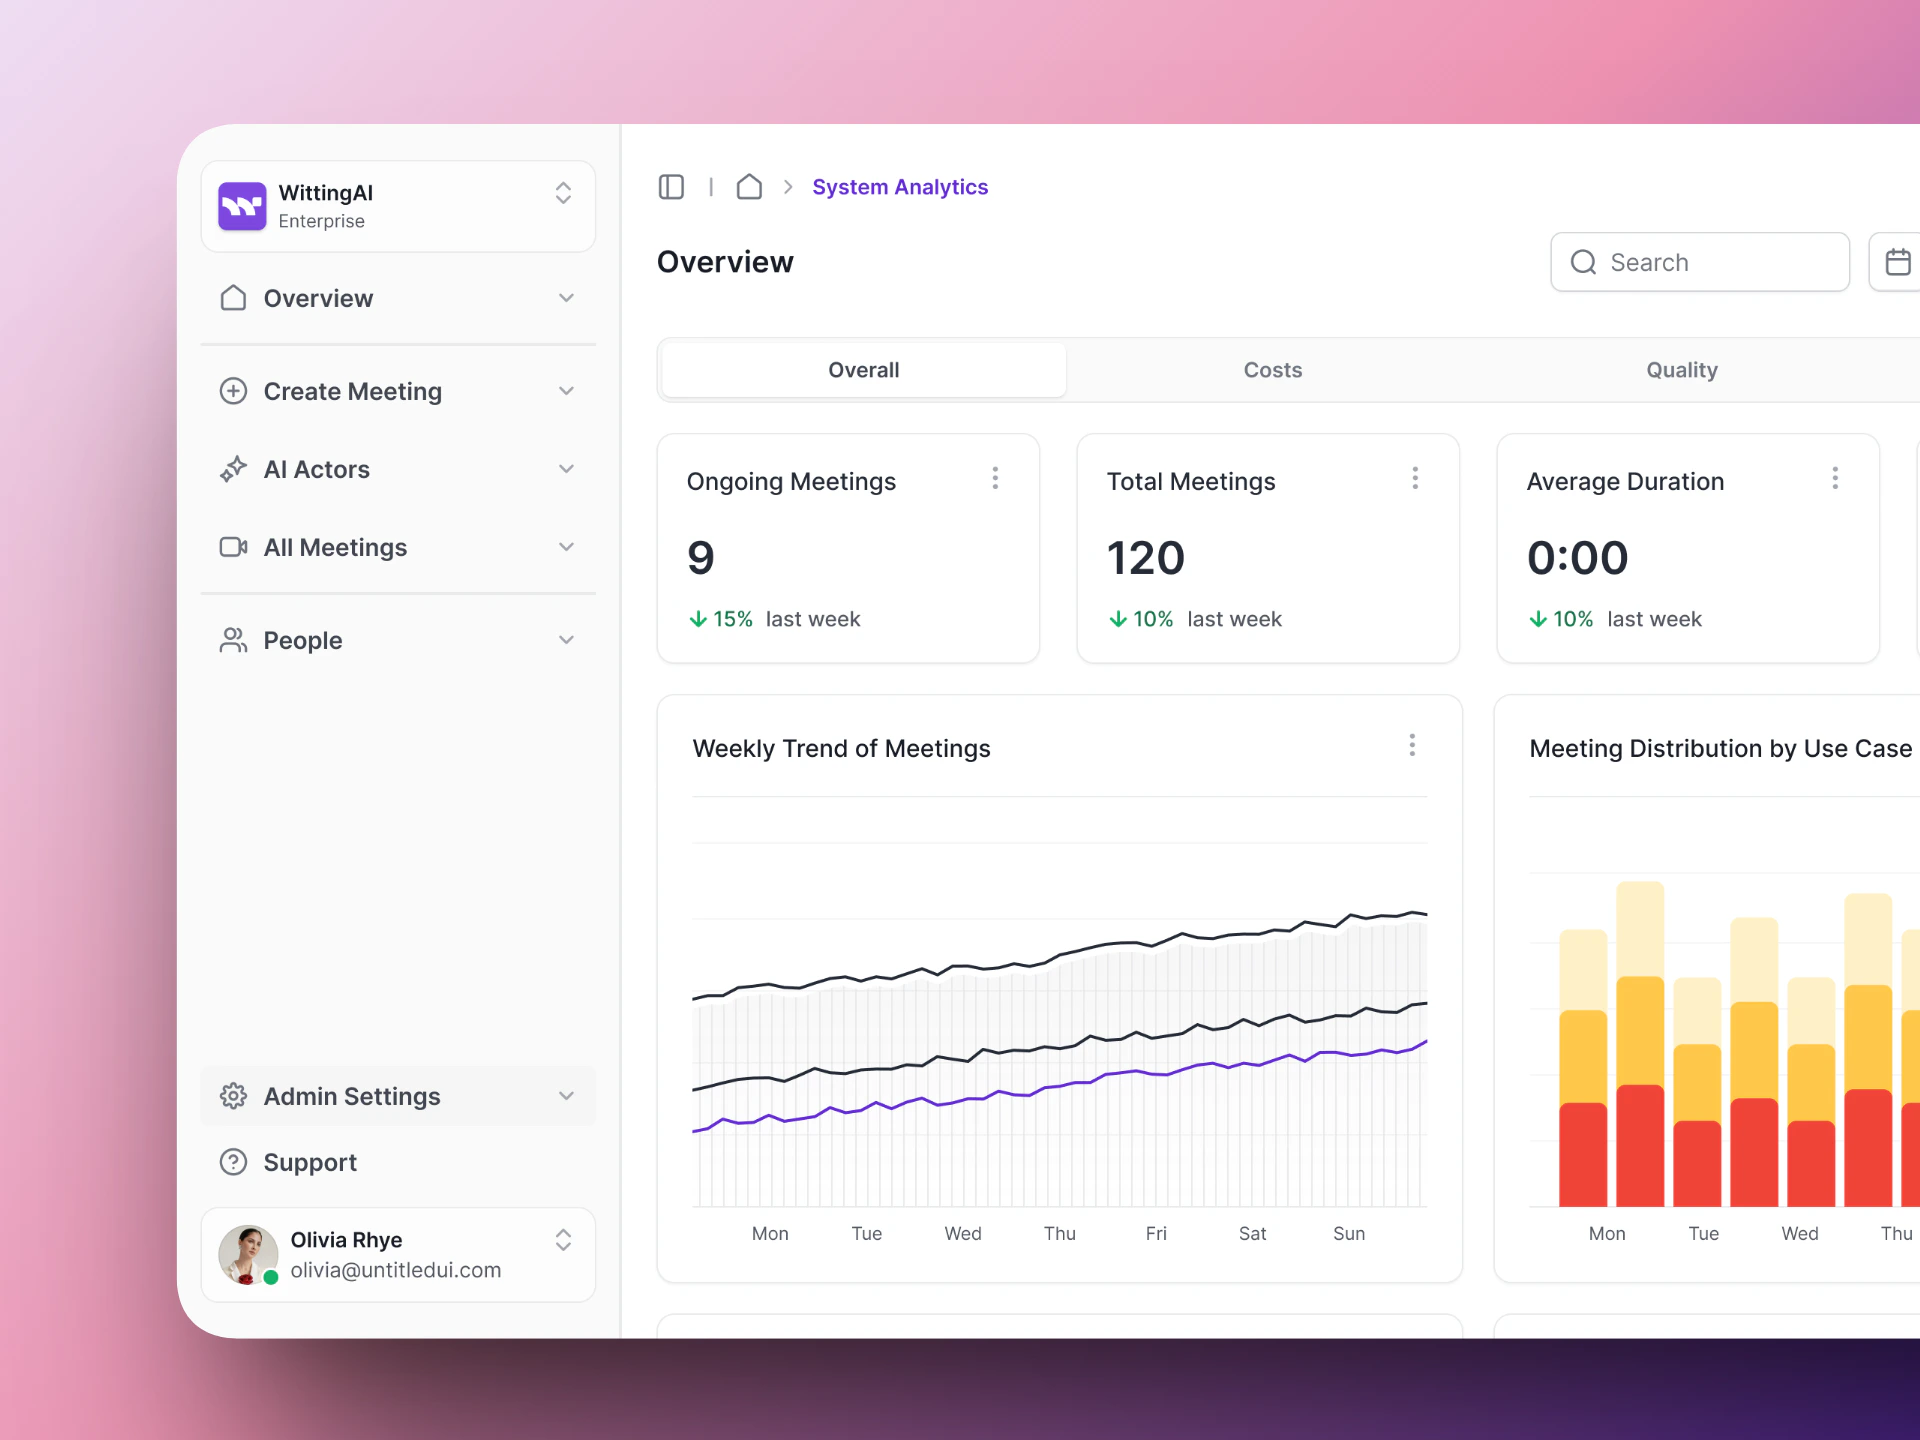
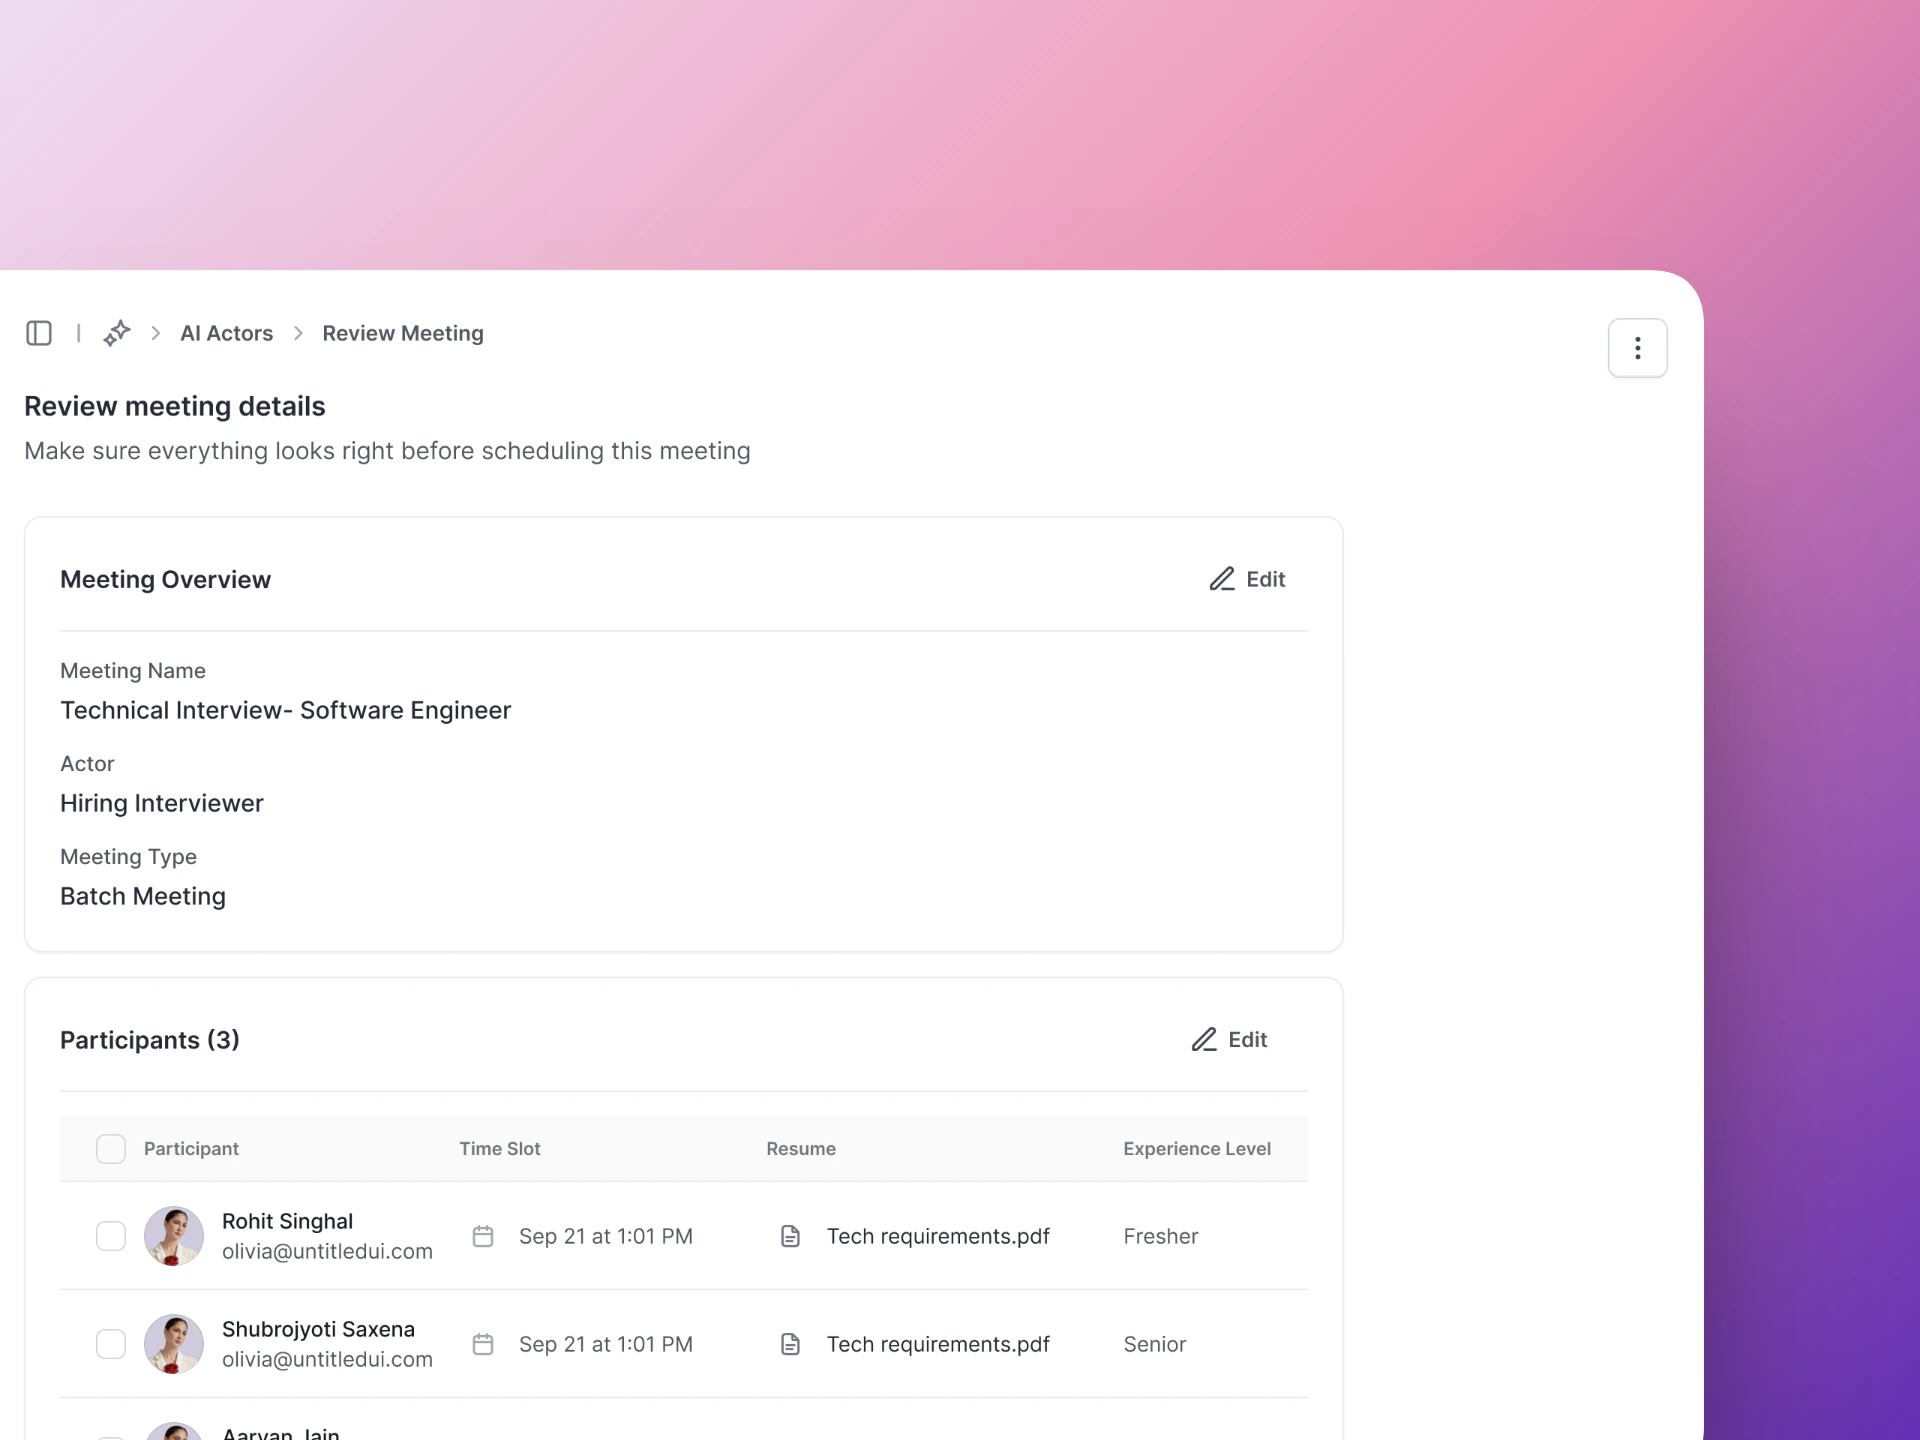
## Step 4: Review the results
After the meeting completes:
1. Go to **Calendar** in the left sidebar.
2. Click the completed meeting.
3. Review the **transcript**, **insights**, and **assessment summary**.
Vocalis creates the meeting, sends the invite, and schedules the AI Actor to join at the right time.
For more detail, see [Create a Meeting](/vocalis/getting-started/schedule-meeting).
## Step 4: Review the results
After the meeting completes:
1. Go to **Calendar** in the left sidebar.
2. Click the completed meeting.
3. Review the **transcript**, **insights**, and **assessment summary**.
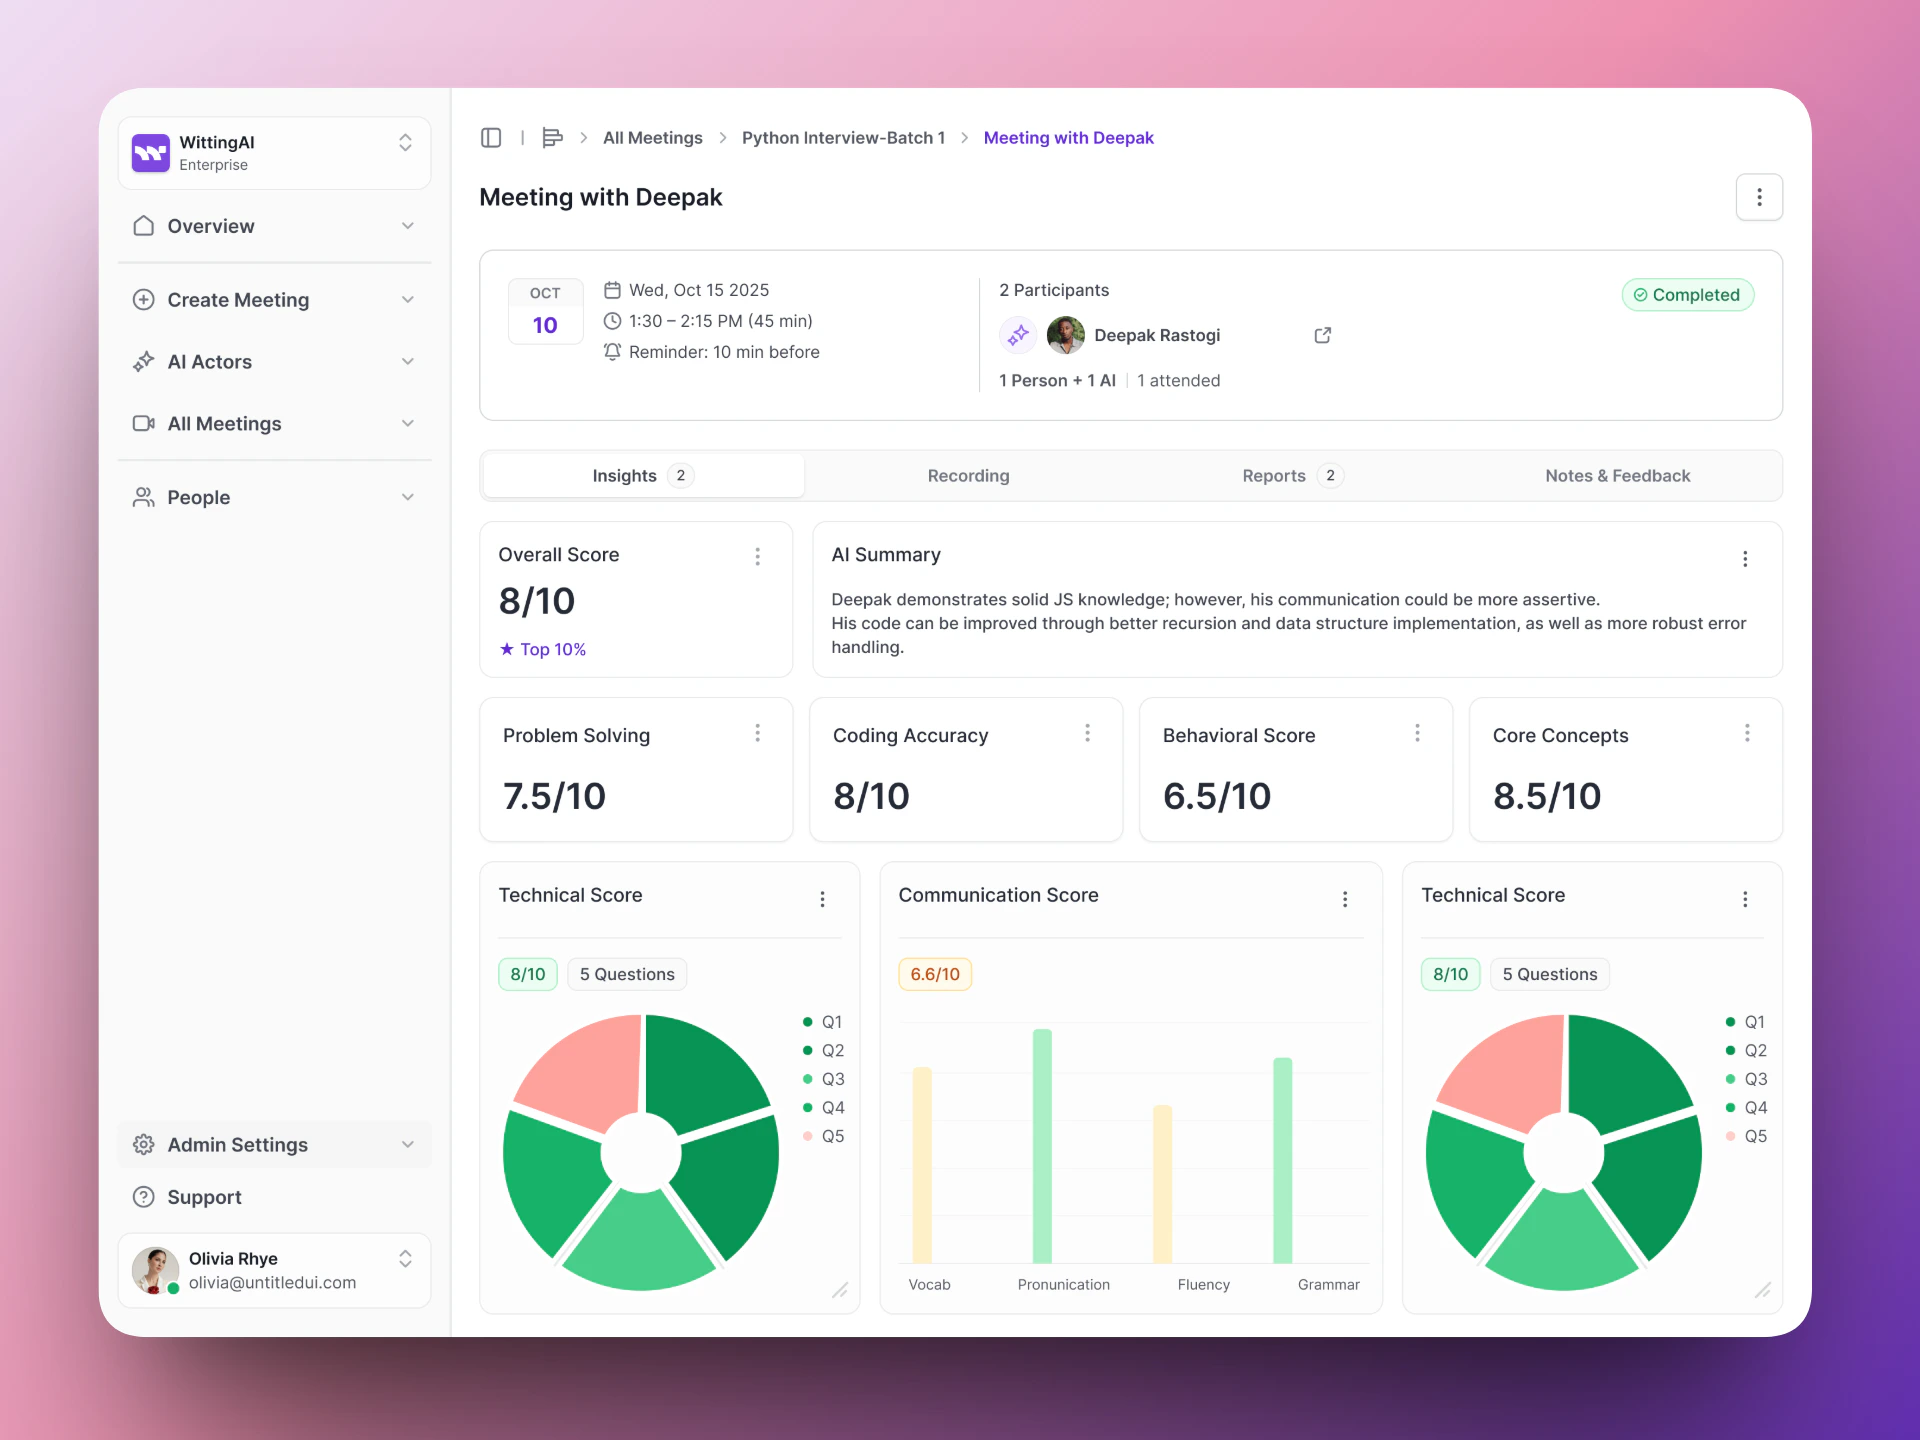 The insights you configured will be populated with data extracted from the conversation — ready for your team to compare across candidates.
## Next steps
Deep dive into AI Actor setup.
Write more effective instructions for your AI Actors.
The insights you configured will be populated with data extracted from the conversation — ready for your team to compare across candidates.
## Next steps
Deep dive into AI Actor setup.
Write more effective instructions for your AI Actors.